New Merchant Order
Starting your Order
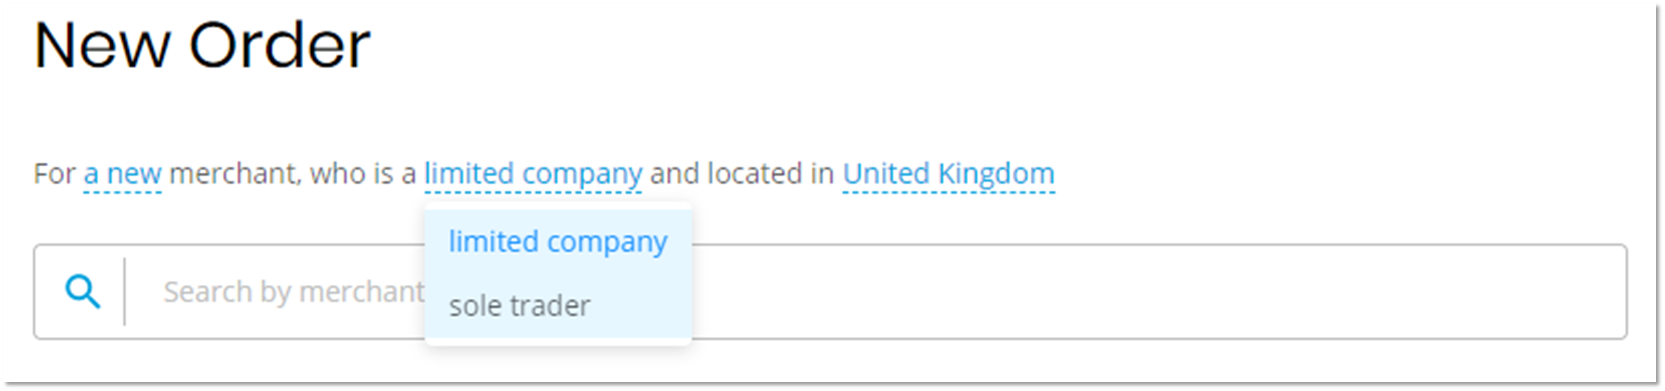
The Order Portal provides three filters when starting an order, the selections made govern what information the Order Portal requires. Each of the filters is highlighted in the text using a different font colour and an underline.
The three choices are highlighted below.

- Confirming whether the merchant is new or existing.
- Confirming whether the merchant is a limited company or a sole trader.
- Confirming the merchant’s location – either UK, Ireland or Other.
The selections made here will cause the Order Portal to amend the order flow.
In this case, we will leave Option 1 as New.
Merchant Information
The first step in placing an order in the Order Portal is to enter the key Merchant information, including contact details. To make this easier we have included a feature that allows the searching of Companies House information where the Merchant is registered.
Registered Merchant
For a Merchant registered with either Companies House for the UK or the CRO in Ireland, a search can be performed which allows the merchant data to be downloaded rather than manually entered. Before starting to enter the merchant name ensure the filters are set to the correct values.
As the merchant name is entered into the search box the matching results are displayed.
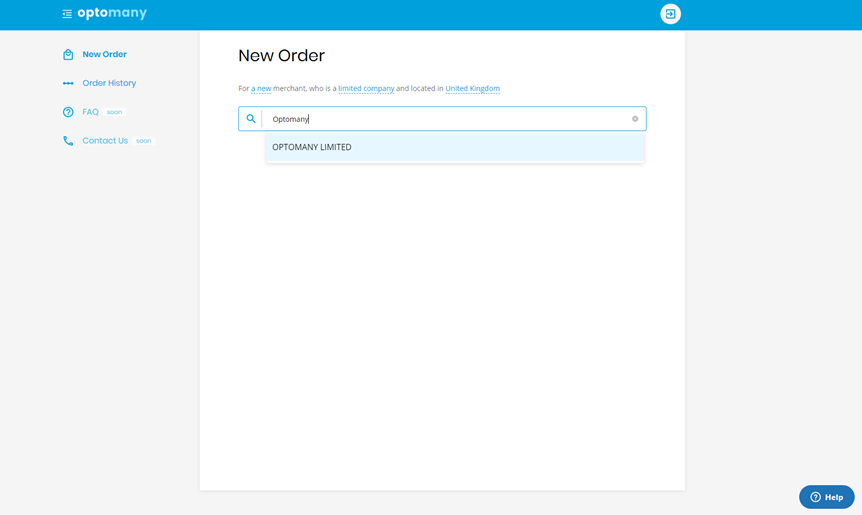
Once the desired business has been located click on the entry shown in the dropdown and all available information will be downloaded and applied automatically.
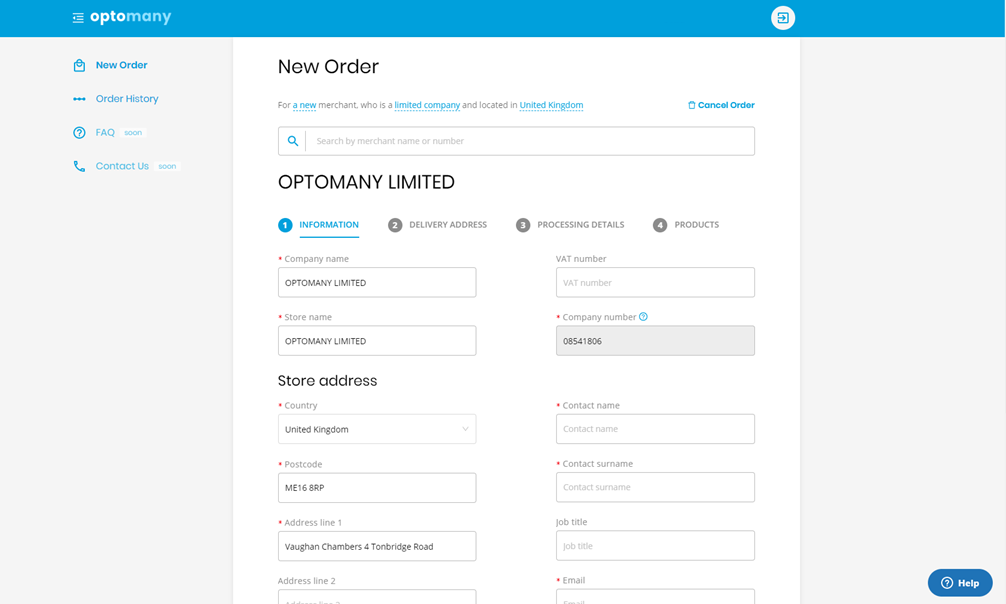
Information downloaded can be amended if required. Please ensure that all mandatory fields have been completed, shown by the presence of an asterisk *. Once all mandatory information has been entered press the NEXT button to continue.
Sole Trader
There will be occasions where an order is required to be processed for a business or sole trader who is not registered with Companies House.
In these scenarios select the option sole trader on the second filter.
The Order Portal then allows all the required fields to be updated manually. Please complete all mandatory fields and press NEXT to continue.
Stores & Departments (Partner Only)
- ISO App
- Partner App
This step is not required for an ISO Order. You can skip to Delivery Details.
Once the main merchant details have been captured the Merchant Stores (physical locations) and Departments (where the solution configuration is held) need to be created.
As an example, see the below.
| Merchant | Merchant Store | Merchant Department |
|---|---|---|
| Famous DIY Store | Maidstone | Trade Sales |
| Retail Sales | ||
| Café | ||
| Tunbridge Wells | Trade Sales | |
| Retail Sales | ||
| Café |
The above example shows “Famous DIY Store” as the Merchant, two Merchant Stores (one of each physical location) and then three Merchant Departments under each Store. This then allows for the configuration to vary completely between each of them, the Merchant ID and acquirer could be unique in each one, the “Trade Sales” department could have a higher maximum transaction limit and the “Café” could have gratuity enabled which would not be wanted in the others.
This flexibility is there for scenarios where Merchants need it – it is not a mandatory requirement. The minimum for each New Merchant order is to have one Merchant Store containing one Merchant Department and in the vast majority of cases this will be sufficient.
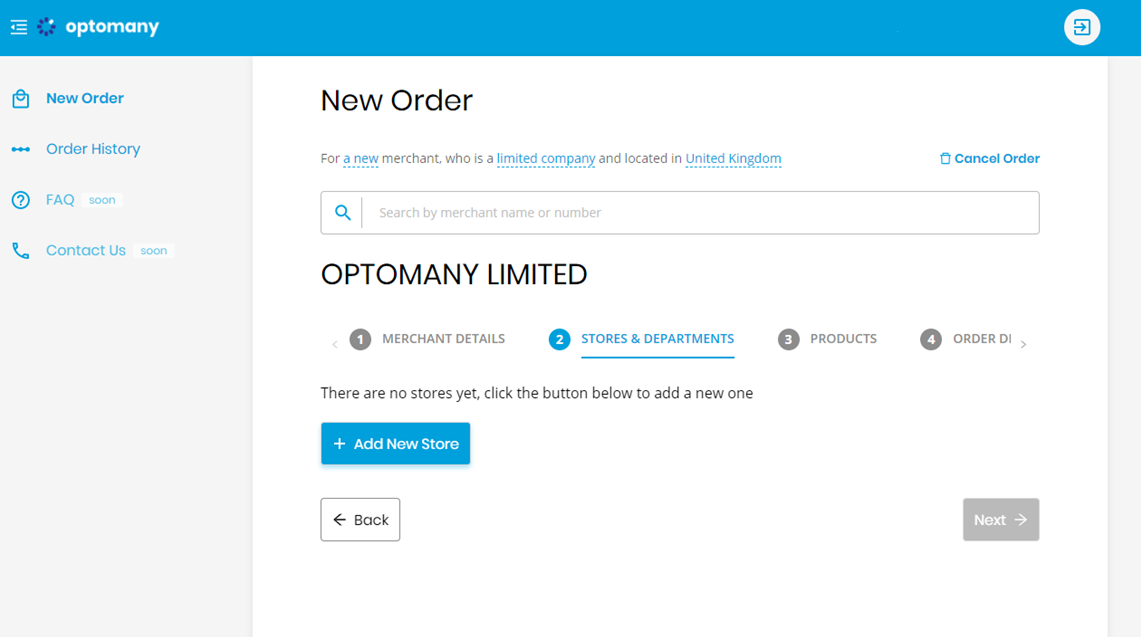
To begin configuring the Merchant Store(s) press the ADD NEW STORE button, as pictured below.

Creating the First Store
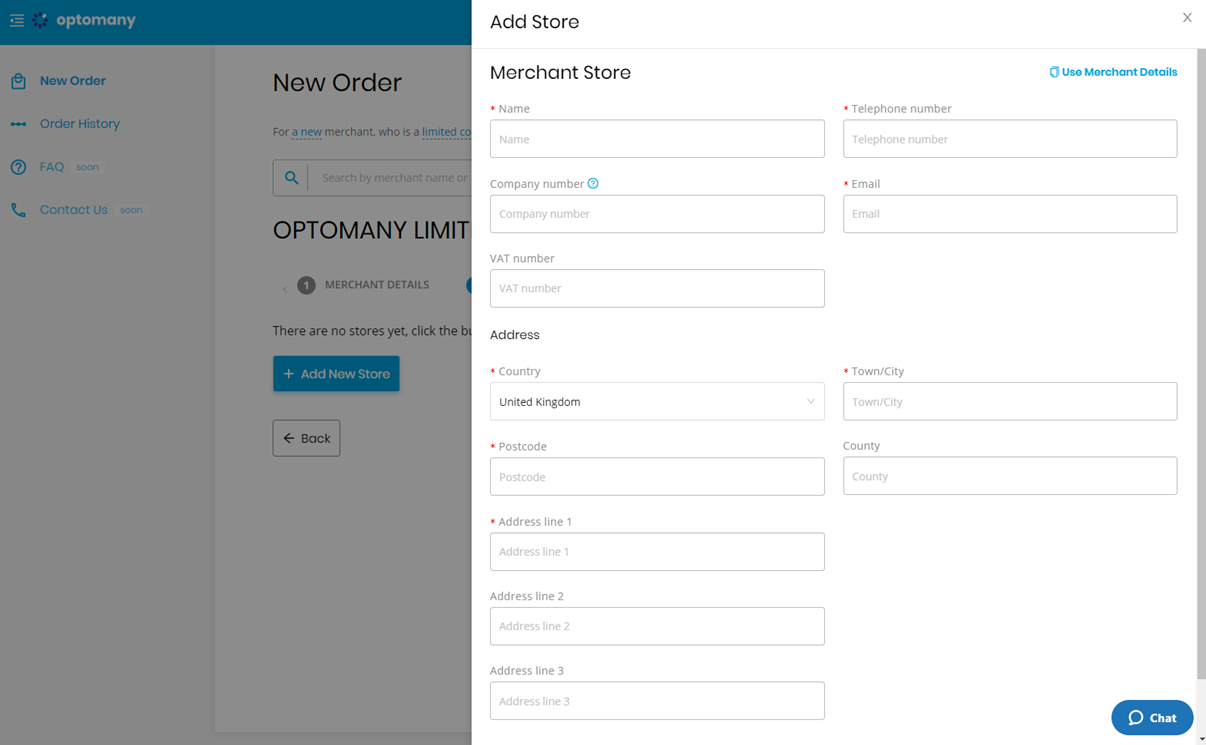
The Order Portal then displays the Add Store window.
If the merchant store details mirror that entered for the merchant already then the Use Merchant Details option can be pressed to automatically complete the mandatory fields. If this is not the case then the Merchant Store information needs to be entered manually. The Order Portal helps with this by using the post code entered to perform an address lookup.
Once all the mandatory elements have been completed press the SAVE BUTTON to continue.
Creating the First Department
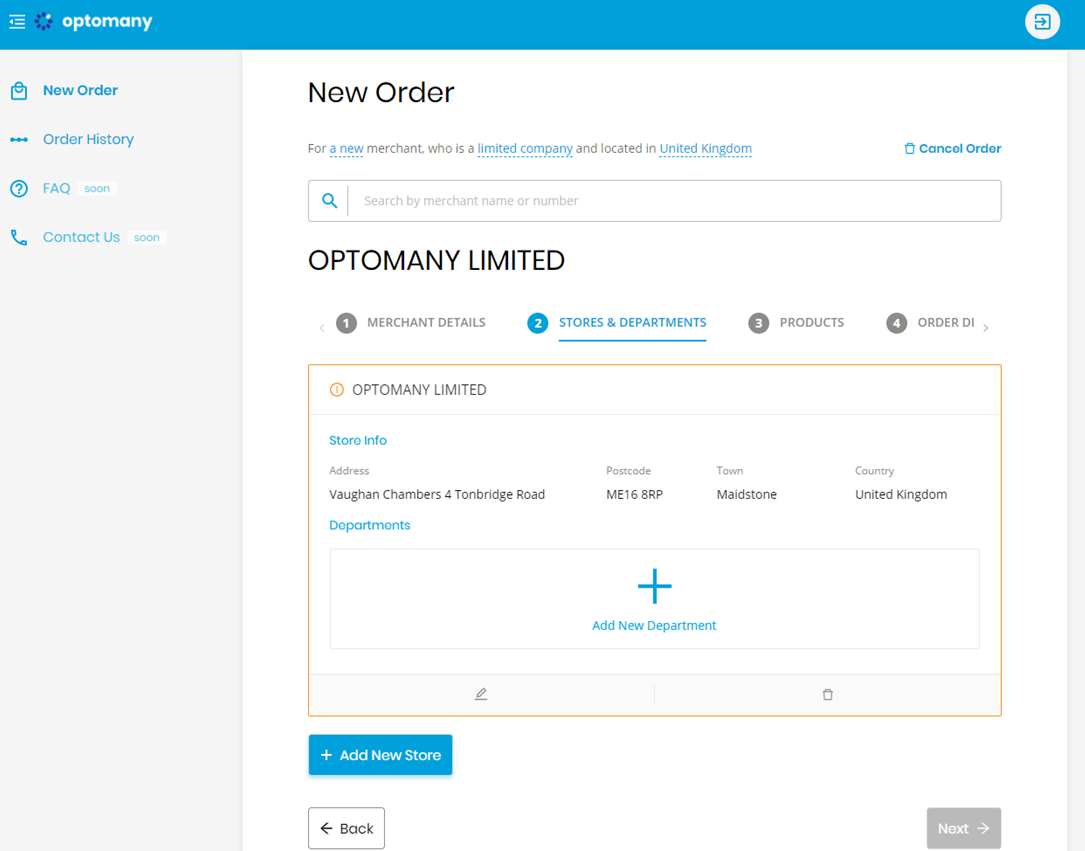
The Merchant Store has been added successfully and the Order Portal now allows the adding of the first Merchant Department. The option to continue is greyed out as the minimum information has not yet been entered.
Click the Add New Department button to proceed.
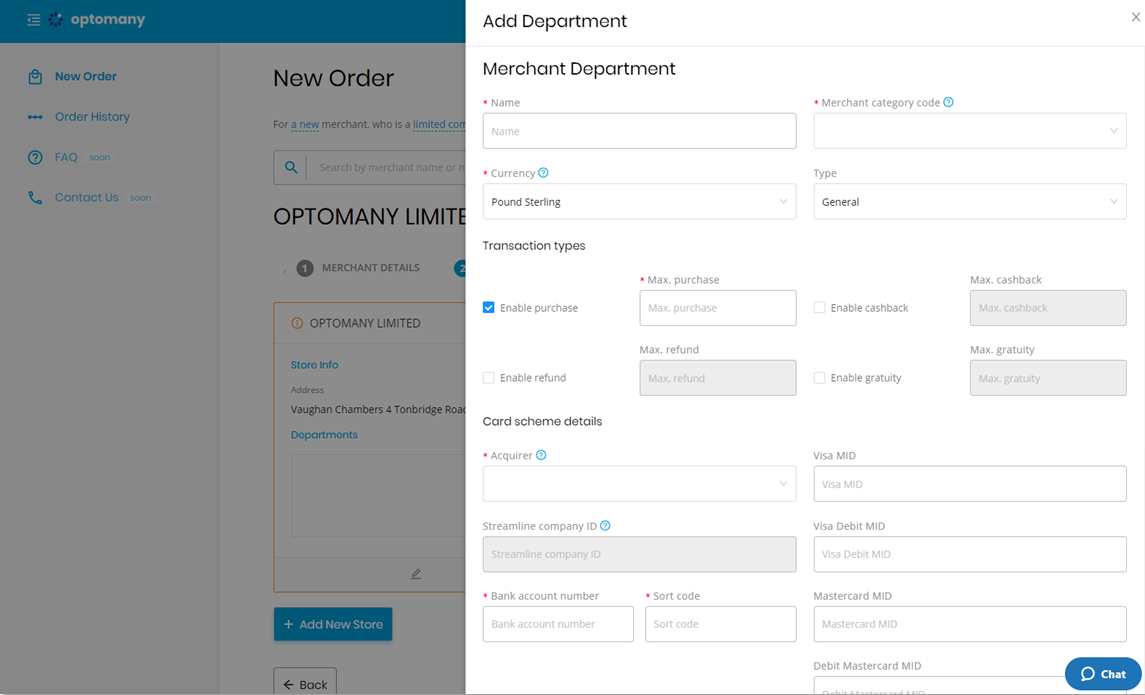
The Order Portal then displays the Add Department window.
Enter all the information for the required configuration ensuring that all fields marked as mandatory with an asterisk * are populated.
If one of the ‘additional card schemes’ (e.g. American Express, Flexecash etc.) are required then entering the merchant number will result in additional data elements being requested by the Order Portal.
Once all the information has been entered press the SAVE BUTTON to continue.
Finalise Stores & Departments
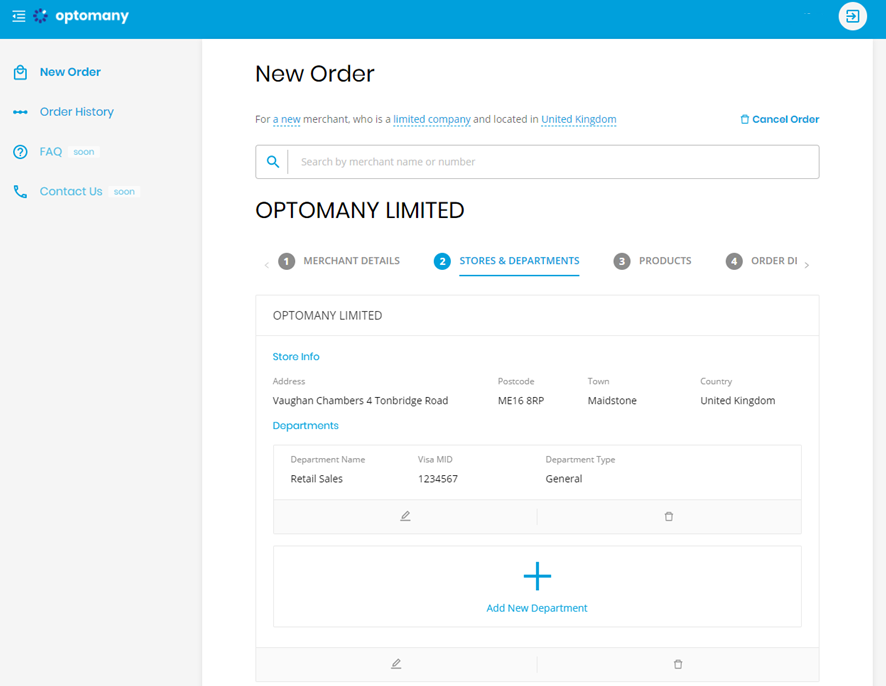
The newly created Merchant Department is shown under the Merchant Store. From this screen it is possible to edit or delete both the Merchant Store and Merchant Department that have been created.
It is also possible to continue adding new Merchant Stores or Departments until the required quantity are present.
When complete press the NEXT button to continue.
Ordering Products (Partner Only)
- ISO App
- Partner App
This step is not required for an ISO Order. You can skip to Delivery Details.
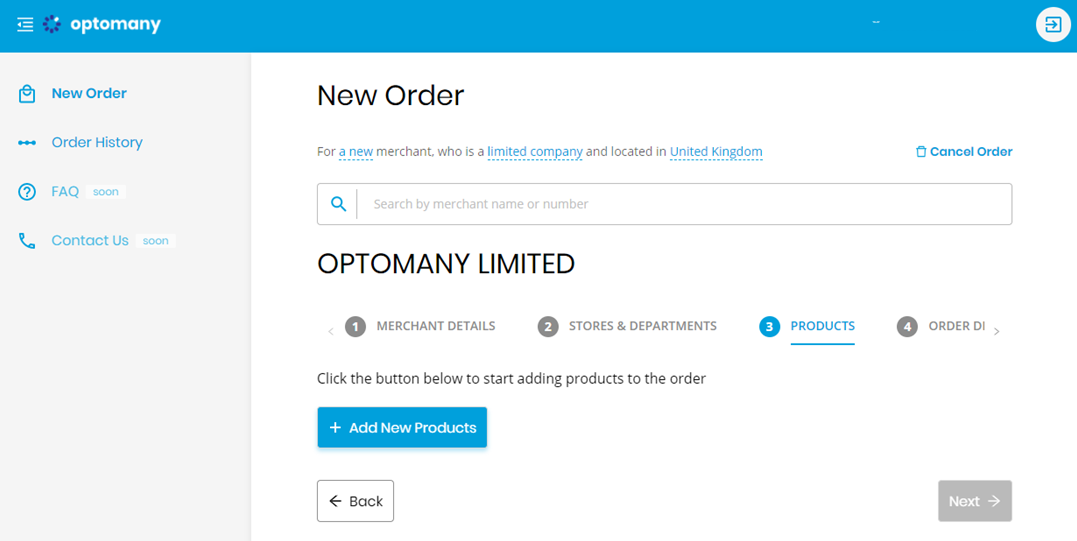
As the merchant configuration has been completed the required products need to be added to the order and allocated to the relevant locations.
Prior to accessing the Order Portal for the first time, product bundles will have been configured for you by your Account Manager. These bundles include a collection of products and the agreed commercial terms for them.
Click the ADD NEW PRODUCTS button to start the two step process.
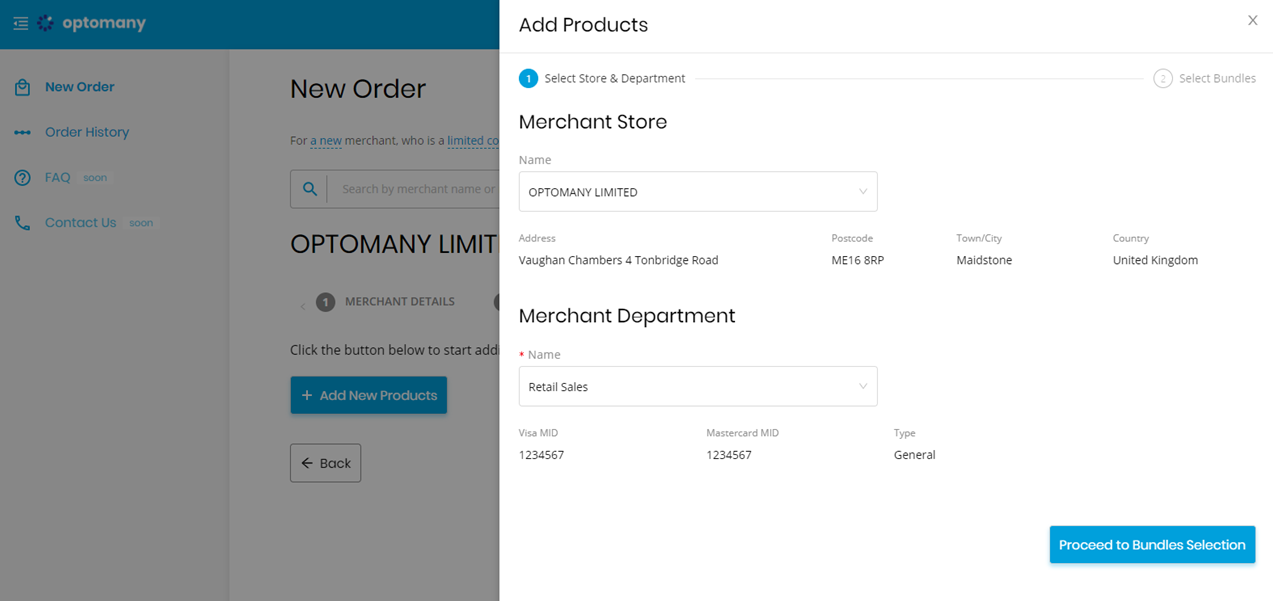
Firstly, choose the Merchant Store and Department where you wish to allocate the bundle and press the PROCEED TO BUNDLES SELECTION button to continue.
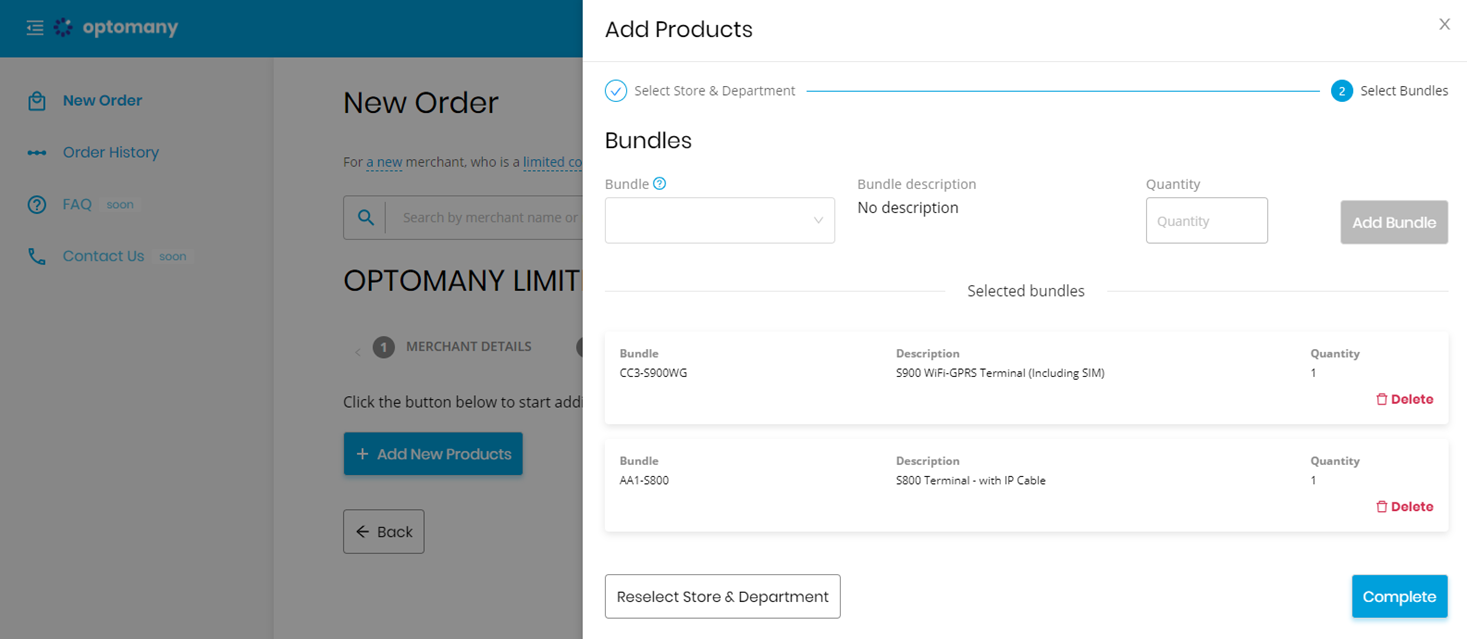
Choose the required bundle from the dropdown box and enter the required quantity. Click the ADD BUNDLE button to add the bundle. If a mistake is made a bundle can be removed by clicking the DELETE button. If a mistake was made and a different Merchant Store and Department was required, click RESELECT STORE & DEPARTMENT button to return to the selection screen.
Once all the bundles have been added click COMPLETE to store the choices.
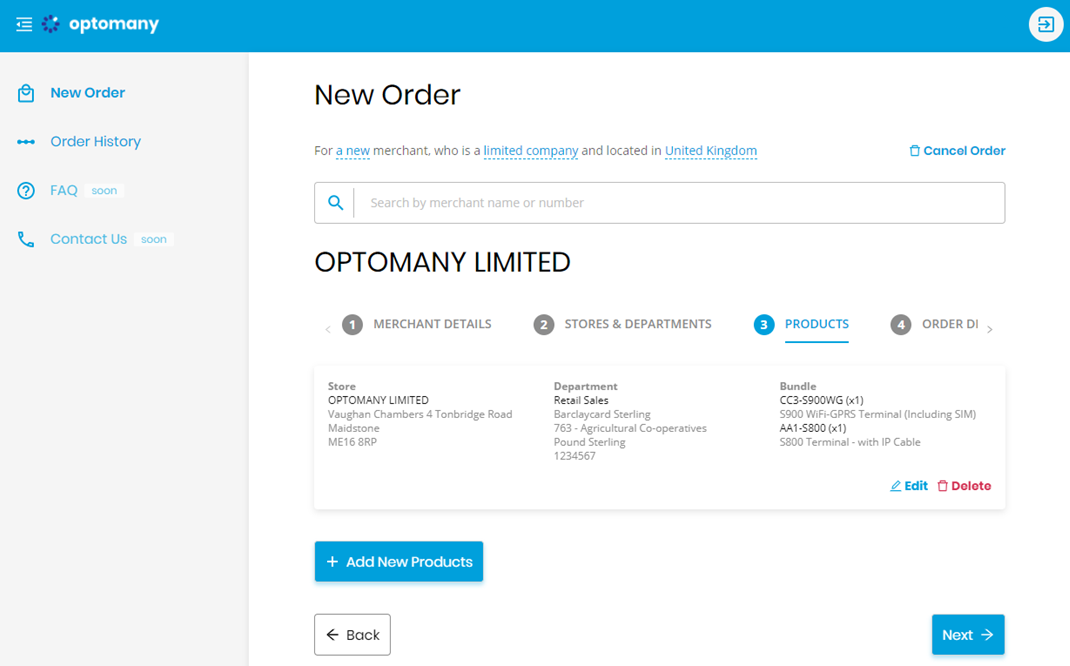
The Order Portal shows a summary view of all the bundles added to the order. If there are any updates required click the EDIT button to amend the choices. The DELETE option can be used to remove the bundles entirely if needed.
Once all the bundles have been allocated press NEXT to continue.
Order Information (Partner Only)
- ISO App
- Partner App
This step is not required for an ISO Order. You can skip to Delivery Details.
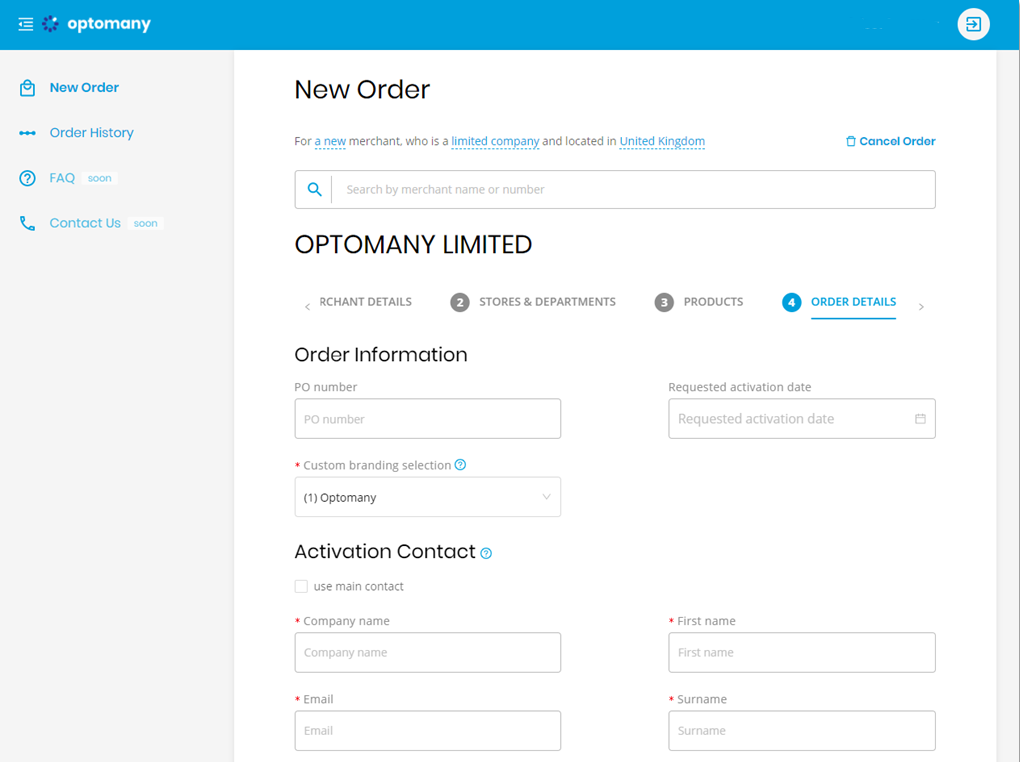
The Order Portal now requests some basic order details;
- PO Number for the order (if required by the Partner ordering).
- Target activation date for the order.
- Custom branding selection – if branding exists for the Partner.
Finally, the contact details are requested for the person who wishes to receive the activation details for the order once complete. If the user’s details have already been added as the contact, they can be copied automatically by choosing the USE MAIN CONTACT option.
Once all mandatory fields have been completed press NEXT to continue to Delivery Details
Delivery Details
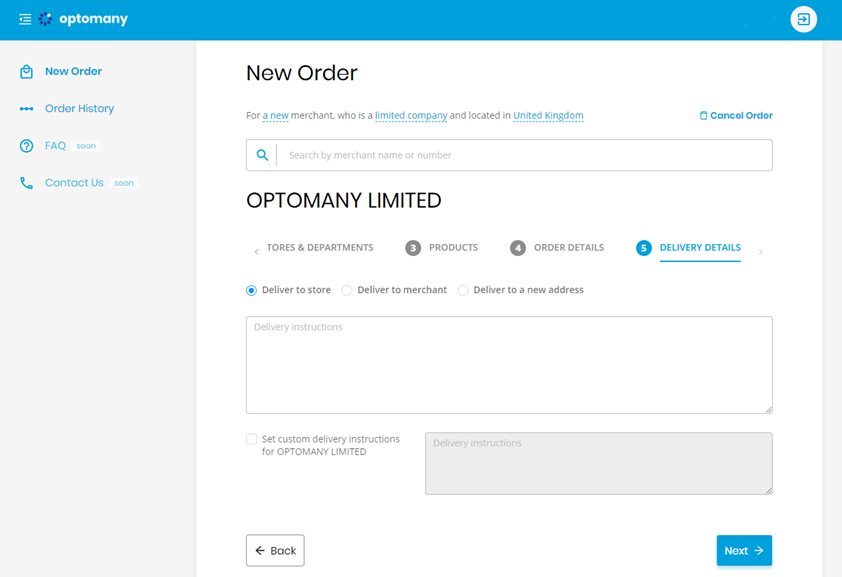
The final step of the order entry is to confirm the delivery arrangements. The Order Portal provides three options.
| Delivery Option | Description |
|---|---|
| Deliver to Store | Items ordered for a specific Merchant Store & Department configuration will be delivered to the address of the Merchant Store. |
| Deliver to Merchant | All items for the entire order will be dispatched to the main address already provided for the Merchant. |
| Deliver to a New Address | Selecting this option will prompt the Order Portal to allow the user to enter a completely different address for the items to be shipped to. |
In addition to providing the options around the delivery the Order Portal also allows the user to enter custom delivery instructions (limited to 50 characters) either for the entire order or for each delivery if the “Deliver to Store” option is chosen.
Once the required option has been chosen, and completed where applicable, press the NEXT button to continue.
Processing Details (ISO Only)
- ISO App
- Partner App
The Processing Details for the Merchant relate to the various configuration items we require to allow the Merchant to process transactions. This includes items such as the Acquirer the Merchant uses for processing, the currency the transactions should be processed in, or the cash back and gratuity settings.
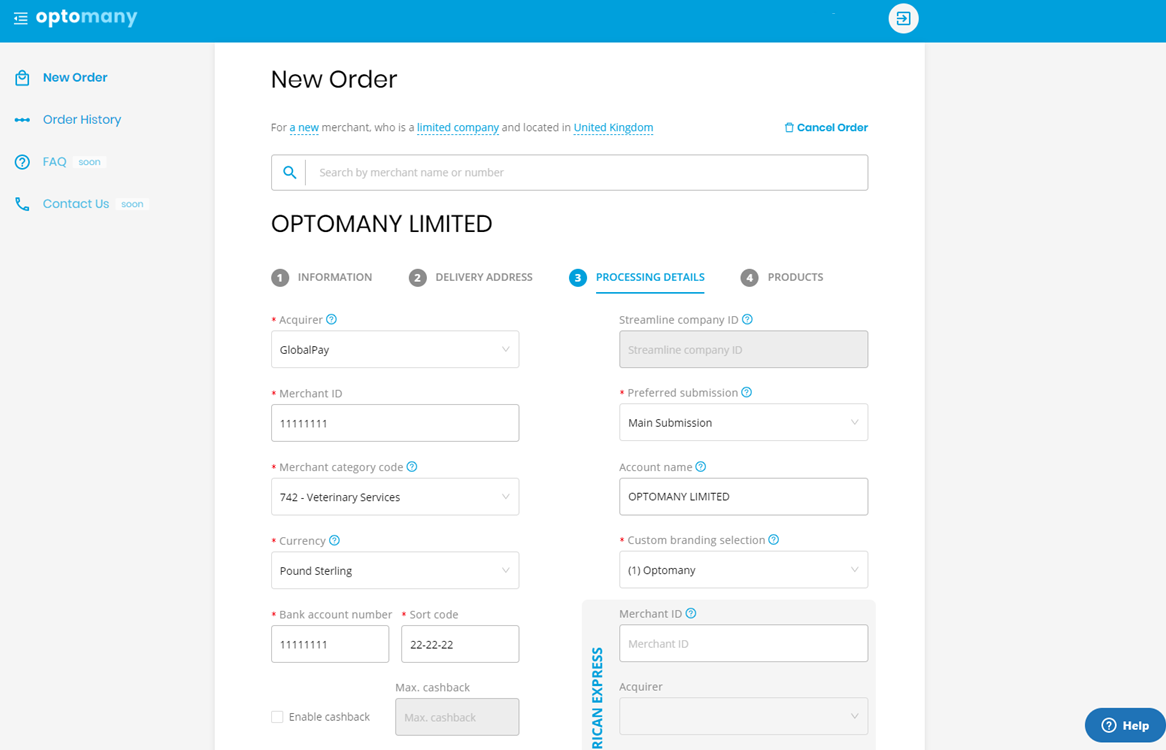
As with all sections of the Order Portal all mandatory fields are indicated via the use of an asterisk * and help is available via the ? symbol if it is needed.
When all mandatory information has been completed press the NEXT button to continue.
This step is not required for a Partner Order. You can skip to Order Summary.
Products (ISO Only)
- ISO App
- Partner App
The final phase of the order process requires the user to select the bundle required to be ordered.
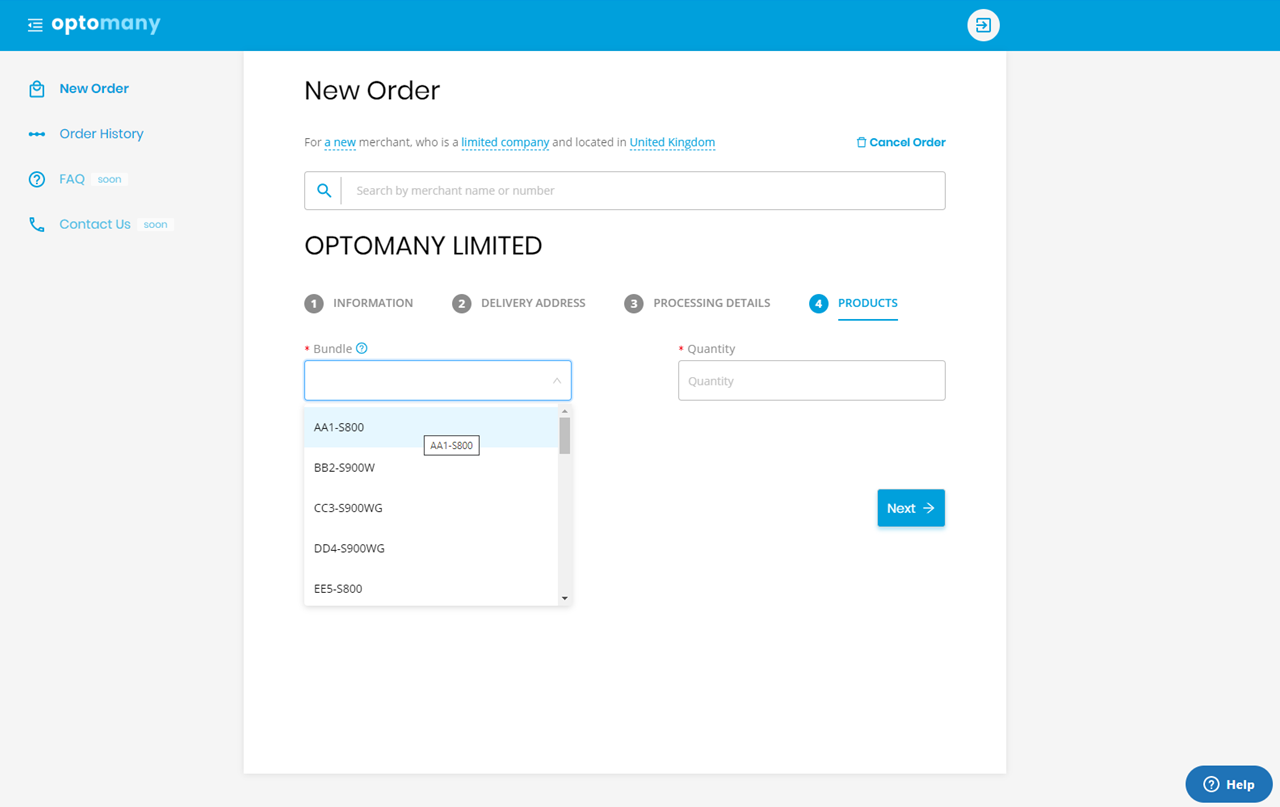
The “Bundle” dropdown list will show all available bundles as per your agreement with Optomany. Select the bundle required and then enter the quantity required for this order.
If a bundle is missing which is required, please contact your Optomany Account Manager to discuss.
Once the bundle and quantity have been specified press the NEXT button to continue.
This step is not required for a Partner Order. You can skip to Order Summary.
Order Summary & Submission
Summary
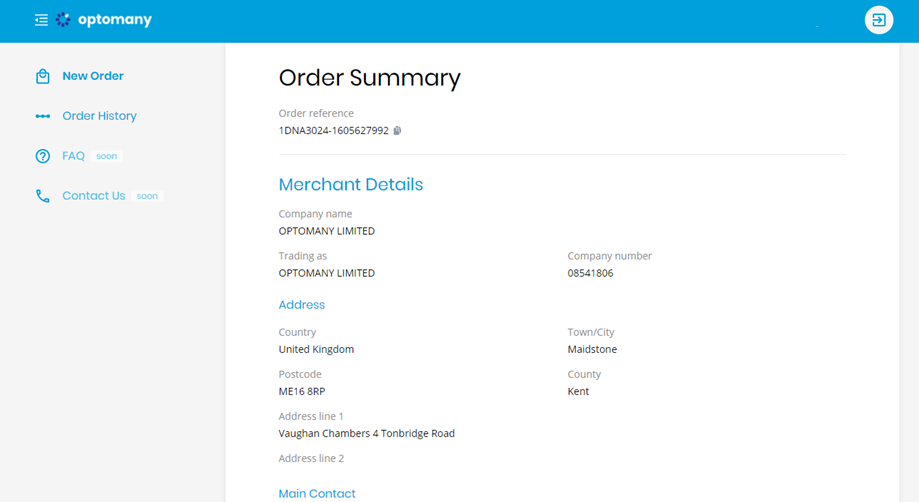
As the data entry for the order is complete the Order Portal then summarises everything that has been captured in the order for validation.
Once all the information has been validated, accept the terms and conditions and press the PLACE ORDER button to submit the order for processing.
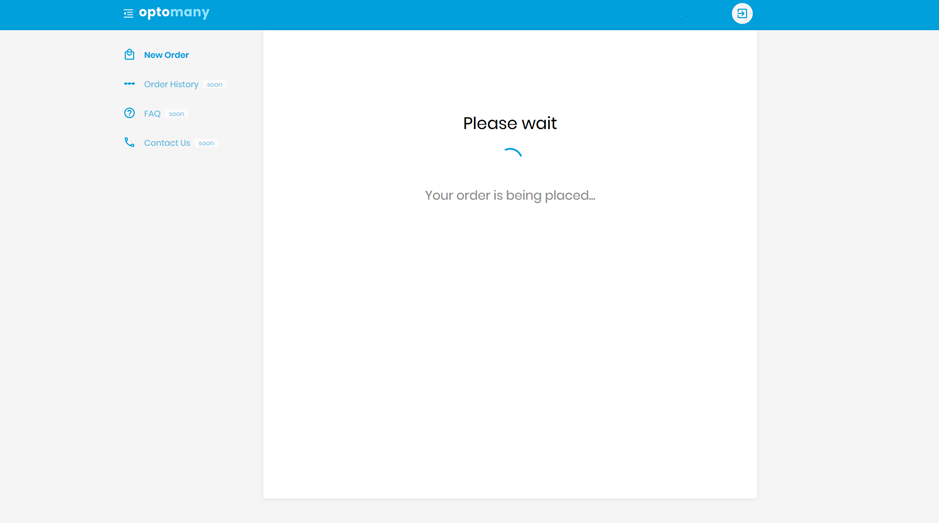
Submitting the Order
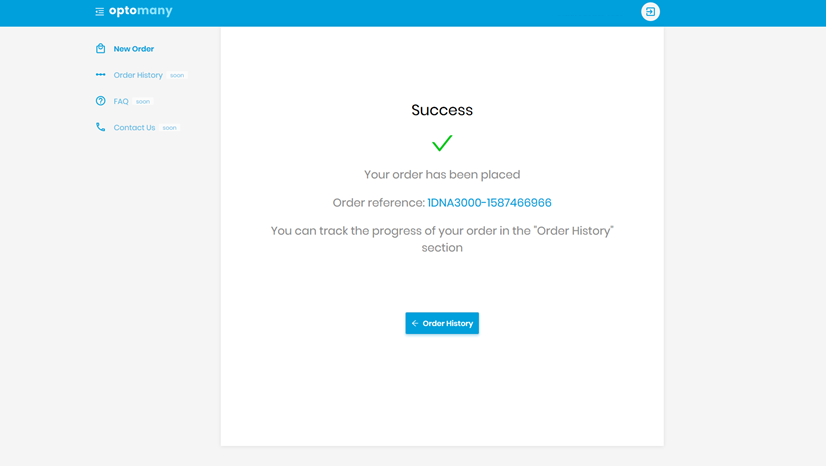
The Order Portal will submit your order for processing.
Once the order has been accepted the Order Portal will confirm as shown below.