Getting Started with Zash
Zash is a feature-rich, market-leading POS application designed for Android devices. It can be used 'standalone' with any android device, but works particularly well when partnered with axept® GO on a PAX A920 Mobile POS Terminal. We call this product Zash GO.
Welcome to Zash GO
Thank you for choosing your Zash GO terminal from your solution provider. Zash GO utilises the PAX A920 terminal and is designed to process transactions as quickly as possible utilising a Wi-Fi or cellular connection.
This user guide assumes you have already set up your A920 following the A920 Quick Start Guide elsewhere on this site.
This guide will show you how to:
- Log in to Zash
- create your first item,
- start a sale and
- pay for it by card, using axept® GO.
Logging in to Zash
| Step | Instruction | Guidance Image |
|---|---|---|
| 1. | Press the ‘Zash’ button to load the application. | 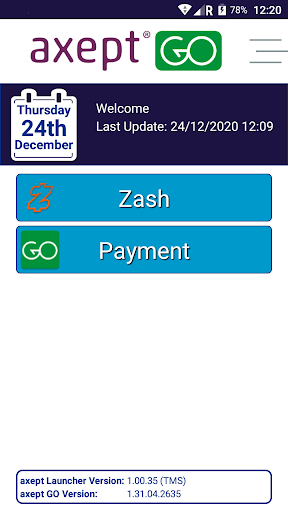 |
| 2. | After a short delay the login screen will be displayed. Press the ‘Sign In’ button. Enter the ‘Email’ and ‘Password’ which have been supplied via email. The details are saved automatically for future use. |  |
| 3. | Following a successful login the main Zash screen will be displayed. | 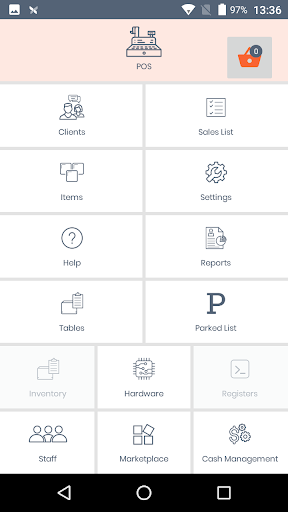 |
| 4. | If the details entered during the login are incorrect an ‘Authentication Failed’ message will be displayed before returning to the login screen allowing the login to be retried. If you are unable to login after another attempt, please request assistance by sending an email to hello@getzash.com and the team will come back to you as quickly as possible. | 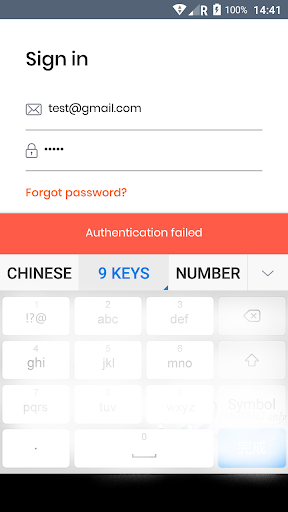 |
Creating your First Item
For the purpose of this demonstration, we're going to create a very basic item, under the 'default' Category. You can find more detailed information on how to set up items, including how to set up Categories for them, in the Zash User Manual.
If you have a lot of items to add, you should get in touch with us. We can provide a template for you to complete and return which will import large data lists quickly.
To create an item, follow the steps below.
| Step | Instruction | Guidance Image |
|---|---|---|
| 1. | Select add item. | 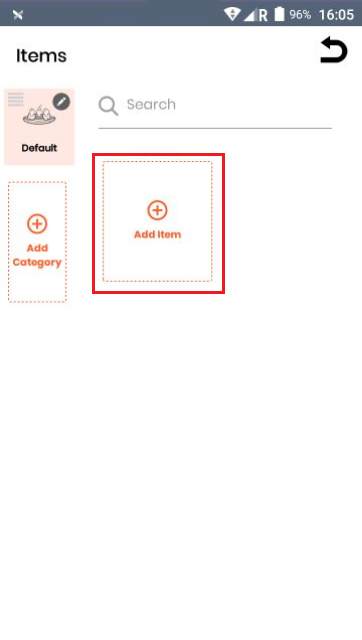 |
| 2. | Give your item a name using the on-screen keyboard and press the Green Arrow to continue. | 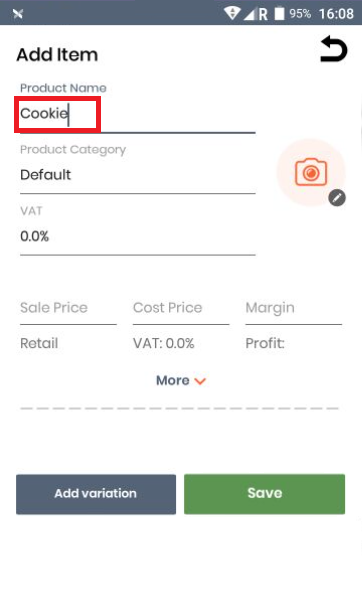 |
| 3. | Enter Sales price, Cost price, and Margin. These fields are required. As you will be using this as a test, you may want to set the price low. | 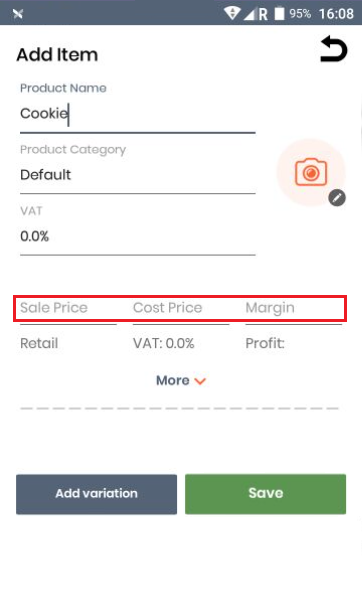 |
| 4. | Press 'Save' when done. Your new item is now displayed. Press the Back arrow to return to the main menu. | 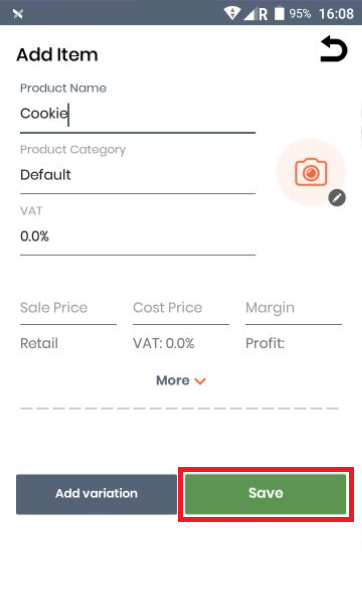 |
Starting a Sale
| Step | Instruction | Guidance Image |
|---|---|---|
| 1. | Select POS at the top of the main menu. | 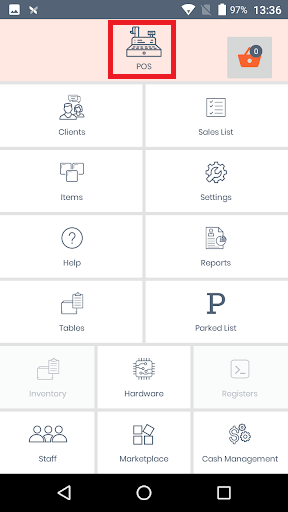 |
| 2. | Select the item(s) you want to process as a Sale. | 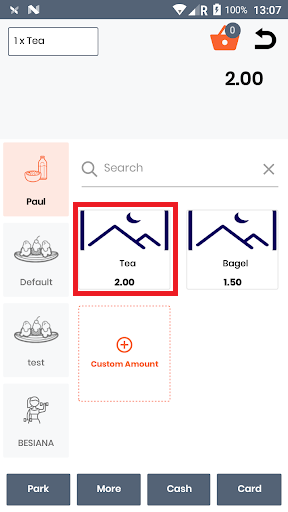 |
| 3. | When the basket is complete, choose 'Card' as the payment method. | 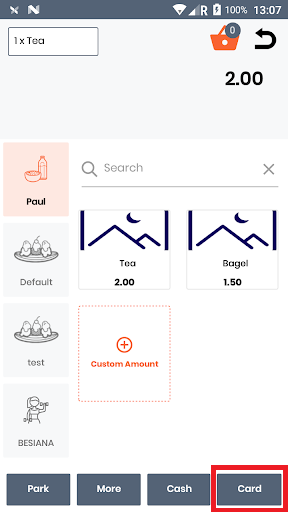 |
| 4. | This automatically starts a card transaction on axept® GO for the correct amount | 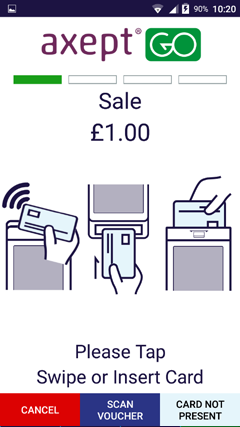 |
Pay for it by Card
axept® GO is a certified payment solution, so will handle card payments seprately from Zash. This helps ensure your card payments are completed in a compliant and secure way.
You should follow all on-screen instructions when processing cards. More detail can be found in the axept® GO User Guide
We're going to process this as a Chip and Pin payment. Please see A920 Contactless for the shorter contactless flow.
| Step | Instruction | Guidance Image |
|---|---|---|
| 1. | Insert the card into the reader in the bottom of the terminal. Please wait, and do not remove the card at this time. |  |
| 2. | On the Enter PIN screen pass the axept® GO terminal to the cardholder and ask them to enter their PIN. Once the PIN has been entered the Green 'Return/Enter' button needs to be pressed. | 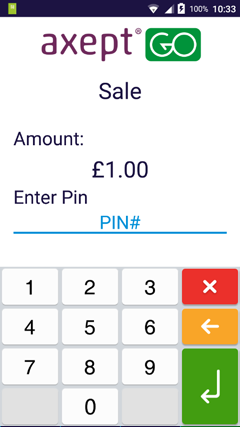 |
| 3. | axept® GO will then begin processing the transaction. This step involves communicating with the Card Issuer so should be monitored. | 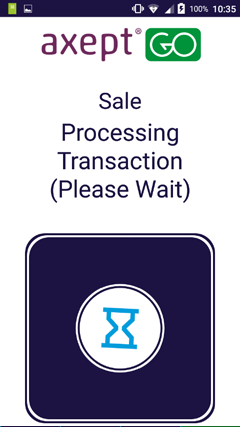 |
| 4. | axept® GO will confirm the result of the transaction. | 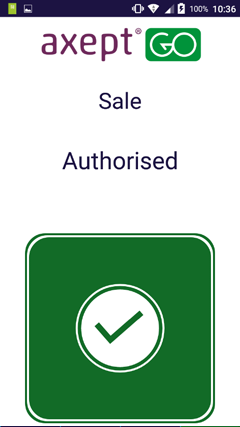 |
| 5. | axept® GO will then print the cardholder copy of the receipt. | 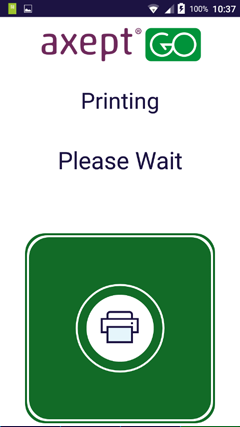 |
| 6. | axept® GO then prompts the merchant to remove the cardholder copy of the receipt. Press OK to continue. | 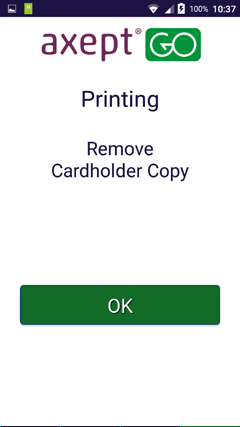 |
| 7. | axept® GO then prints the merchant copy. You should check your copy of the receipt to ensure the payment was authorised, in case you did not see the response on screen in step 4. | 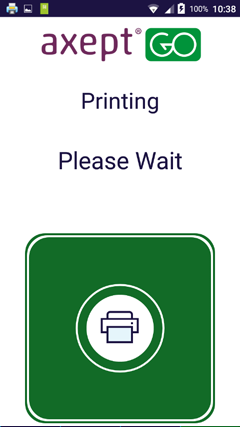 |
| 8. | axept® GO then asks for the card to be removed. | 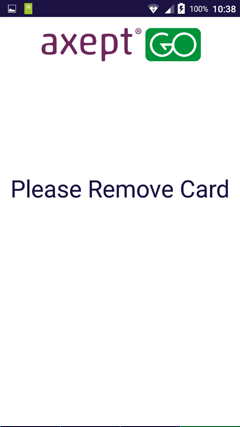 |
| 9. | Once the card is removed a Goods Receipt is offered by Zash. This is optional, and separate from the payment receipt. | 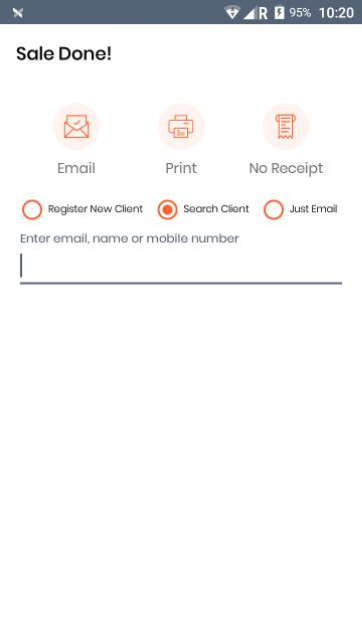 |
| 10. | Select 'No Receipt' and Zash will return to the POS Menu. | 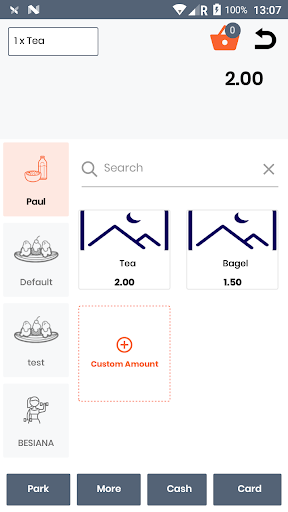 |
Whilst it is possible to configure Zash completely using Zash GO on the A920 terminal, most users find it much more convenient to configure Zash via a larger tablet or a web browser. The Zash user manual which follows assumes in most cases you are using a Web Browser for this reason.