Logging on and Processing Transactions
Logging On
axept® PRO needs you to log in before you can process a transaction. This feature provides additional security, limiting some functions to users with the correct permission. Variable permissions will not have been set up unless you have specifically requested them however. Your user ID and password will have been emailed to you as part of your order, however you can contact us if you need to know them.
| Step | Instruction | Guidance Image |
|---|---|---|
| 1. | Press the “Payments” button to load the application. | 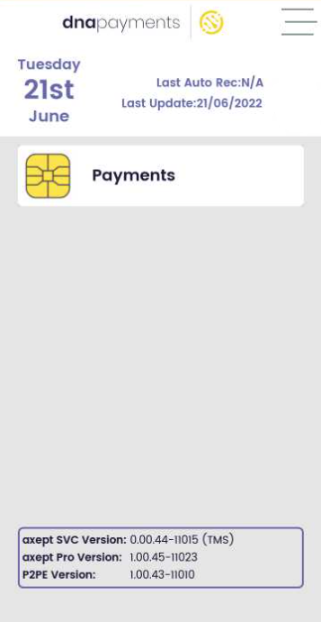 |
| 2. | After a moment the login screen will be displayed. Enter the ‘User ID’ and ‘Password’ supplied via email. You can select 'Save Credentials' to store login details and axept® PRO will use them automatically in future. | 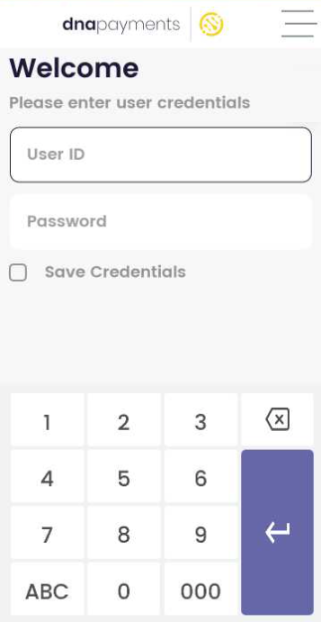 |
| 3. | After a moment, the main axept® PRO screen will be displayed and you are ready to process your first transaction | 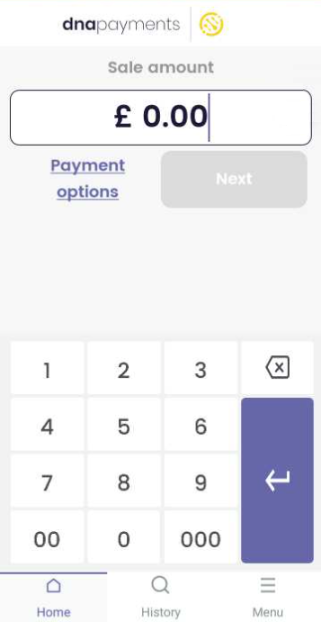 |
| 4. | If the details entered during the login are incorrect axept® PRO will confirm using the screen shown here before returning to the login screen to re-try. |  |
Processing Sales
Chip and Pin
The following flow assumes the card is 'captured' by inserting it and the terminal reading the chip. Some features, such as Cashback, are NOT available when processing via Contactless.
| Step | Instruction | Guidance Image |
|---|---|---|
| 1. | To speed transactions up, axept® PRO will default to starting a Sale transaction - you just need to enter the amount. | |
| 2. | Enter the amount of the sale using the onscreen keypad. axept® PRO automatically adds the decimal point for you. Press the 'Next' button to continue. | 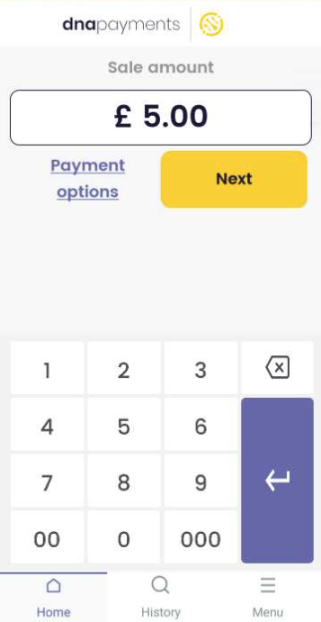 |
| 3. | If Gratuity is configured, it will be offered now. If you have no Gratuity configured, skip to Step 6. | 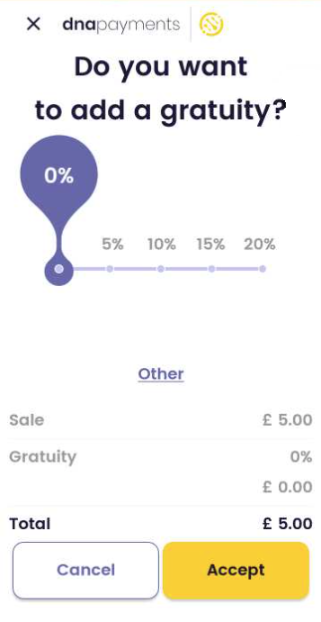 |
| 4. | You can set the gratuity amount with the slider, and press accept. If no gratuity is desired, set the slider to 0% and press 'Accept'. | 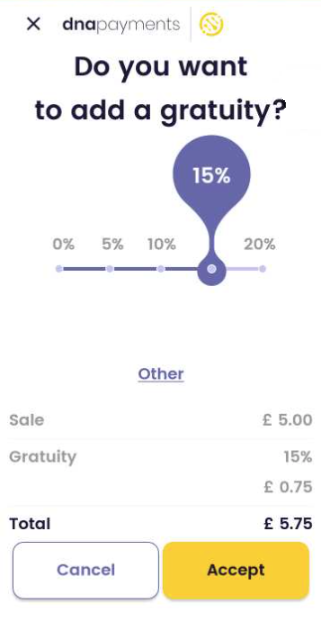 |
| 5. | You can also set the gratuity amount manually by pressing 'Other', entering the amount and pressing 'Accept'. | 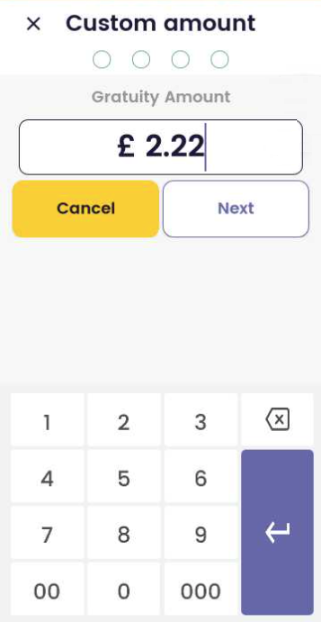 |
| 6. | You will be prompted for a Reference, if this is configured. You are usually able to skip this but it depends on the configuration of your device. Enter a short alphanumeric of your choice and press enter, or Skip. We can arrange to remove this prompt if it is not required, please just contact us. | 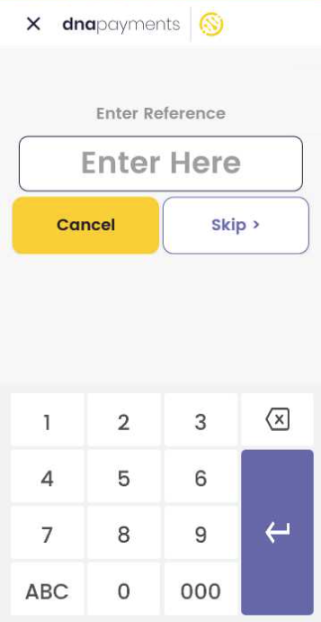 |
| 7. | axept® PRO will prompt for the card to be presented. | 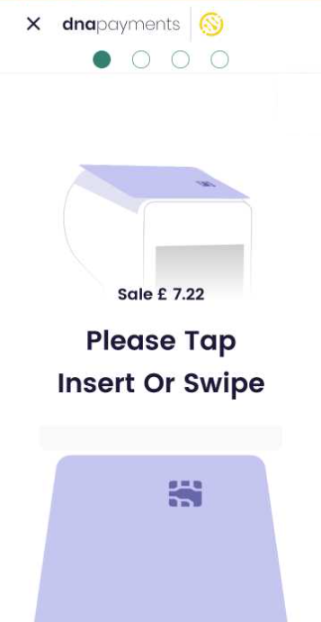 |
| 8. | axept® PRO will read the card for a few seconds. IMPORTANT: Do not remove the card whilst it is being read. |  |
| 9. | axept® PRO will prompt for the PIN to be entered. | 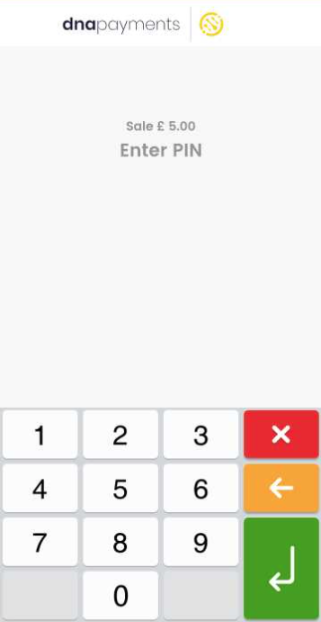 |
| 10. | Input the pin using the touchscreen or keypad and press Enter. |  |
| 11. | Authorisation for the payment amount is completed, usually by going online to check. IMPORTANT: Do not remove the card whilst this is being completed. | 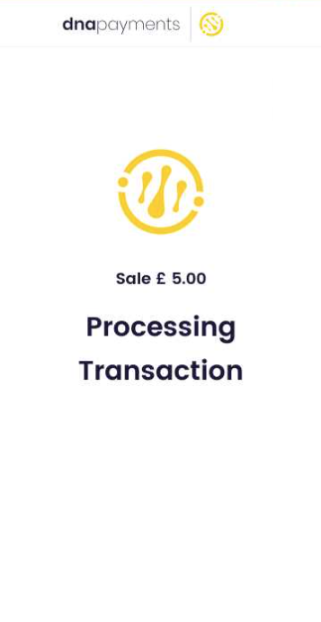 |
| 12. | The result of the transaction is displayed, and you can choose to print the cardholder receipt, or not. Some receipt printing can be disabled automatically, please contact us for more information. | 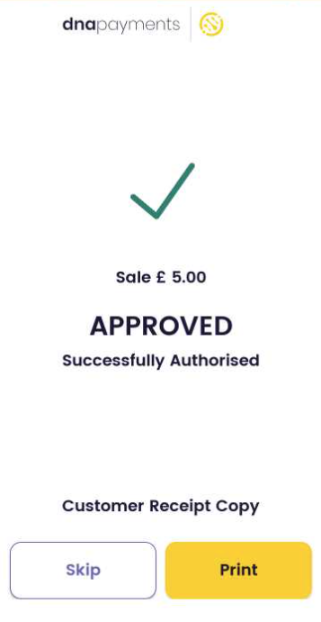 |
| 13. | We've printed only the cardholder receipt in this example, but the messages are the same in each case. You are prompted to remove the first receipt, in this case the Cardholder's. Remember that cardholders are entitled to a receipt, if they request it. It is best practice to maintain this prompt, but you can reprint recent receipts if needed. | 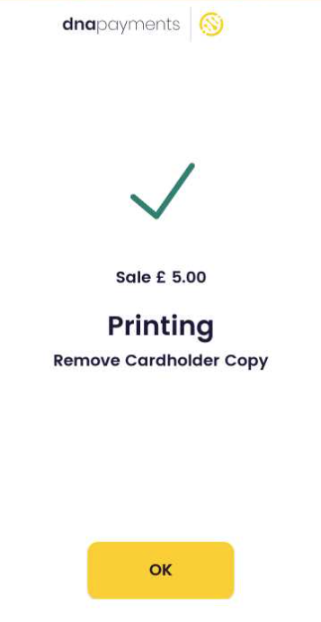 |
| 14. | Finally, axept® PRO will prompt you to remove the card, if it has not already been done. |  |
| 15. | axept® PRO then returns to the Sale screen, ready for the next transaction. | |
Contactless
Contactless payments are started by pressing Sale as in the previous example. If the card is read however, the payment will complete automatically and all you will see is the outcome. There are no options or prompts to complete until the end when you are asked if you want to print the customer receipt. You should ask the customer if they want this receipt.
Whilst Contactless is a very fast payment, it still needs to go online to check with the Cardholder's Issuer. You should not assume a Contactless transaction has been authorised until axept® PRO confirms this on screen and on your receipt.
It is possible that a Card Issuer will ask for the cardholder to complete the payment by Chip and Pin instead of Contactless. This is normal and is designed to protect you from fraud, by ensuring the Customer is Authentic.
Processing Refunds
This guide shows you how complete a Chip & Pin Refund. Not all cards support Contactless Refunds, and you may need to ask the cardholder to insert their card. axept® PRO will prompt this if this is the case.
Refund processing may not be enabled on all logged in users. If you do NOT SEE the Refund button pictured below, please logout and log in with the correct user. If you do not know these user credentials, please speak to your manager, or contact us.
We will only be able to provide this information to the account holder or designated contact.
| Step | Instruction | Guidance Image |
|---|---|---|
| 1. | To start a refund, press the 'Payment Options' button highlighted. | 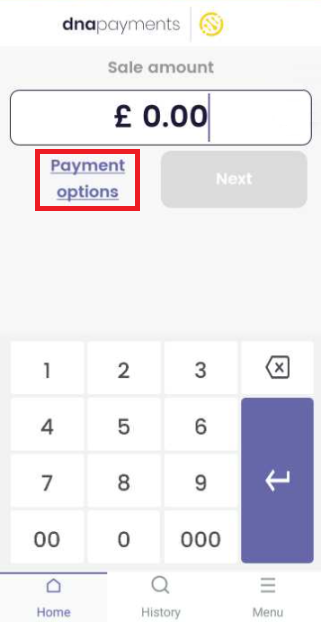 |
| 2. | Select 'Refund' and press 'Done'. | 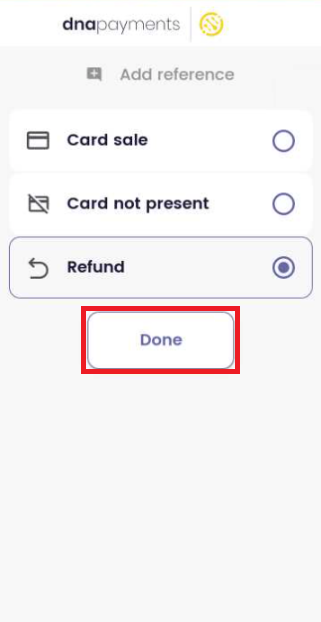 |
| 3. | Enter the Refund amount and press 'Next'. |  |
| 4. | axept® PRO will prompt for the card to be presented. Insert the card into the card reader. |  |
| 5. | On the Enter PIN screen pass the axept® PRO terminal to the cardholder and ask them to enter their PIN. Once the PIN has been entered the Green 'Return/Enter' button needs to be pressed. | 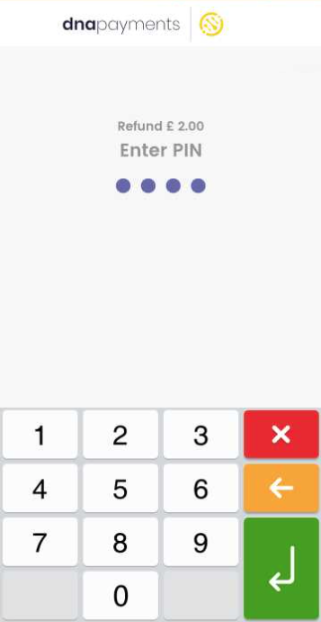 |
| 6. | axept® PRO will then begin processing the transaction. This step involves communicating with the Card Issuer so should be monitored. axept® PRO will then confirm the result of the transaction. | 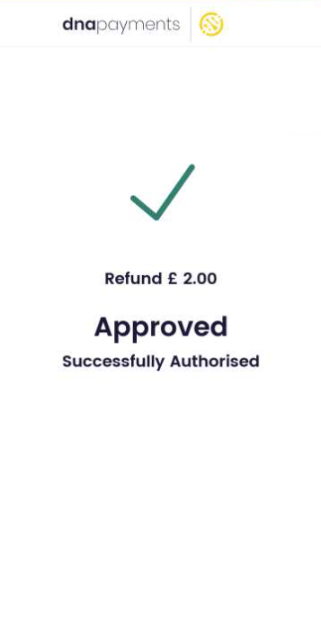 |
| 7. | You are prompted for any receipts to be printed or not. | 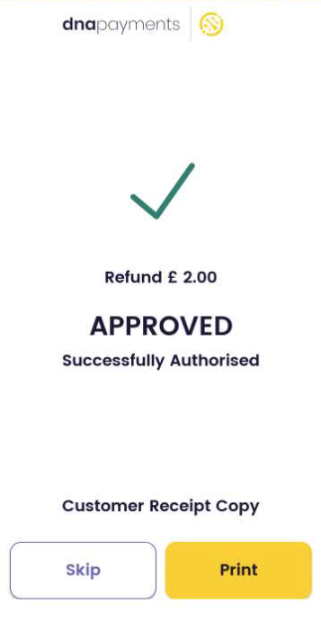 |
| 8. | axept® PRO then asks for the card to be removed. | 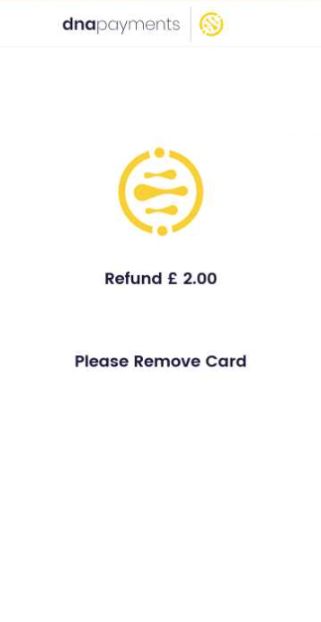 |
| 9. | axept® PRO then returns to the main menu, ready for the next transaction. Note that the default 'Sale' option is selected again. | |