woocommerce
id: woocommerce title: WooCommerce Setup Guide
sidebar_label: WooCommerce
Introduction
DNA Payments are committed to providing secure eCommerce processing to as many merchants as possible. One of the ways this can be achieved is by developing plugins for the global eCommerce marketplaces - allowing merchants to add payment processing to their websites quickly with minimal setup required.
Reflecting this commitment DNA Payments are pleased to offer a payment plugin for the WooCommerce platform. WooCommerce is an open-source eCommerce plugin for WordPress. It is designed for small to large-sized online merchants using WordPress. Launched in September 2011, the plugin quickly became popular for its simplicity to install and customise.
This guide details the steps needed to configure the DNA Payments plugin for WooCommerce.
Plugin Pre-requisites
Before starting the setup, process there are a small number of pre-requisites which need to be in place.
- Create a merchant account with DNA Payments - if this has not already been done please visit the signup page to complete an application.
- Create an account with Wordpress and setup your website.
- Obtain the DNA Payments WooCommerce plugin (zip file). Please rename this file to
wc-dnapyments-gateway.ziponce it has downloaded.
Credentials
- Test
- Live
| Credential | Description |
|---|---|
| Test Client ID | ID issued by DNA Payments for each test merchant. |
| Test Client Secret | Secret issued by DNA Payments for each test merchant. |
| Test Terminal ID | Test terminal ID issued by DNA Payments - unique to each merchant site. |
| Credential | Description |
|---|---|
| Live Client ID | ID issued by DNA Payments for each live merchant. |
| Live Client Secret | Secret issued by DNA Payments for each live merchant. |
| Live Terminal ID | Live terminal ID issued by DNA Payments - unique to each merchant site. |
Should any of the above details be missing please contact us.
Obtaining the DNA Payments Plugin
The plugin can be downloaded from our Github page using this link. You need to rename the downloaded zip file to wc-dnapyments-gateway.zip however before attempting to install it.
Installing the DNA Payments Plugin
DNA Payments are currently working with WooCommerce to add the plugin to the WooCommerce store. Until this has been completed the plugin will need to be manually installed. The steps for this manual installation are detailed below.
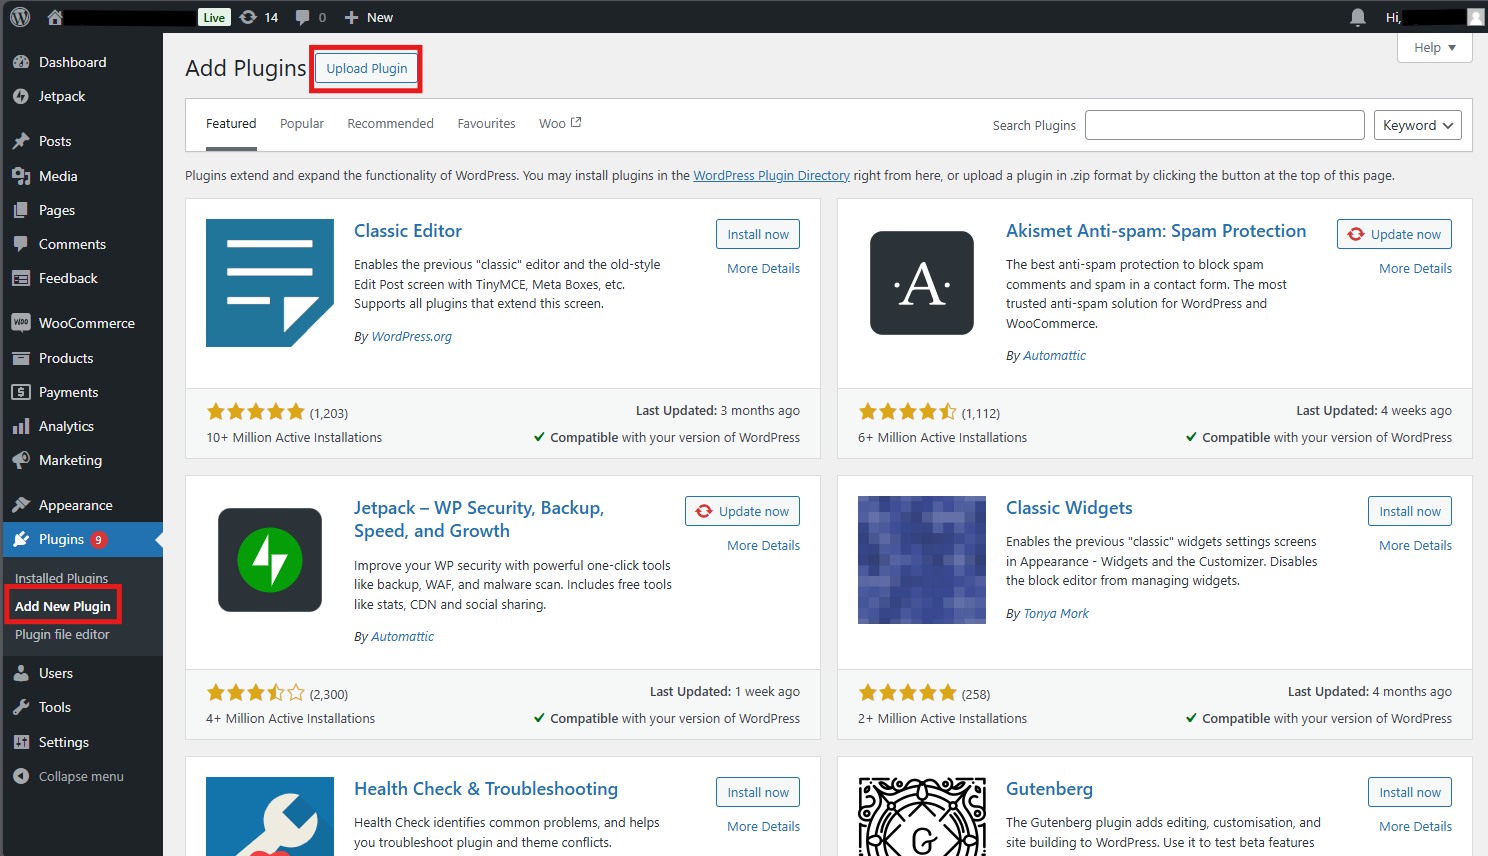
Step One
Sign into WooCommerce (test or live as required) and access the ‘Plugins’ section. At the top left-hand corner of the page there is an option to ‘Add New’. Click this option.
Step Two
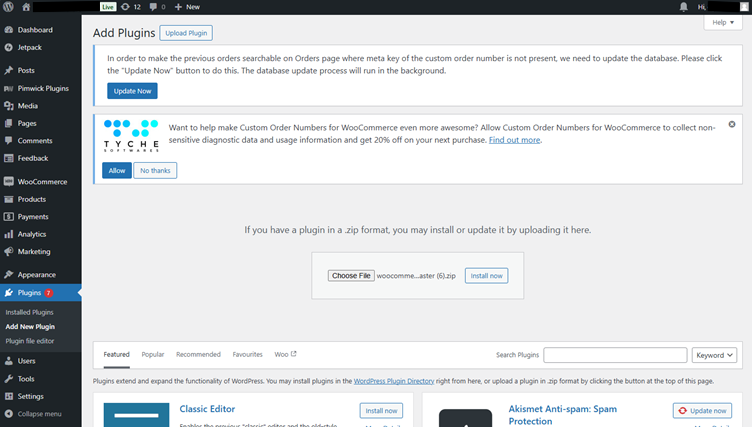
On the ‘Add Plugins’ page select the ‘Upload Plugin’ option. Select the zip file provided by DNA Payments.
Step Three
Once selected WordPress will first upload, unpack, install and then validate the plugin. Once that process is complete the above screen will be shown. Click the ‘Activate Plugin’ option.
Step Four
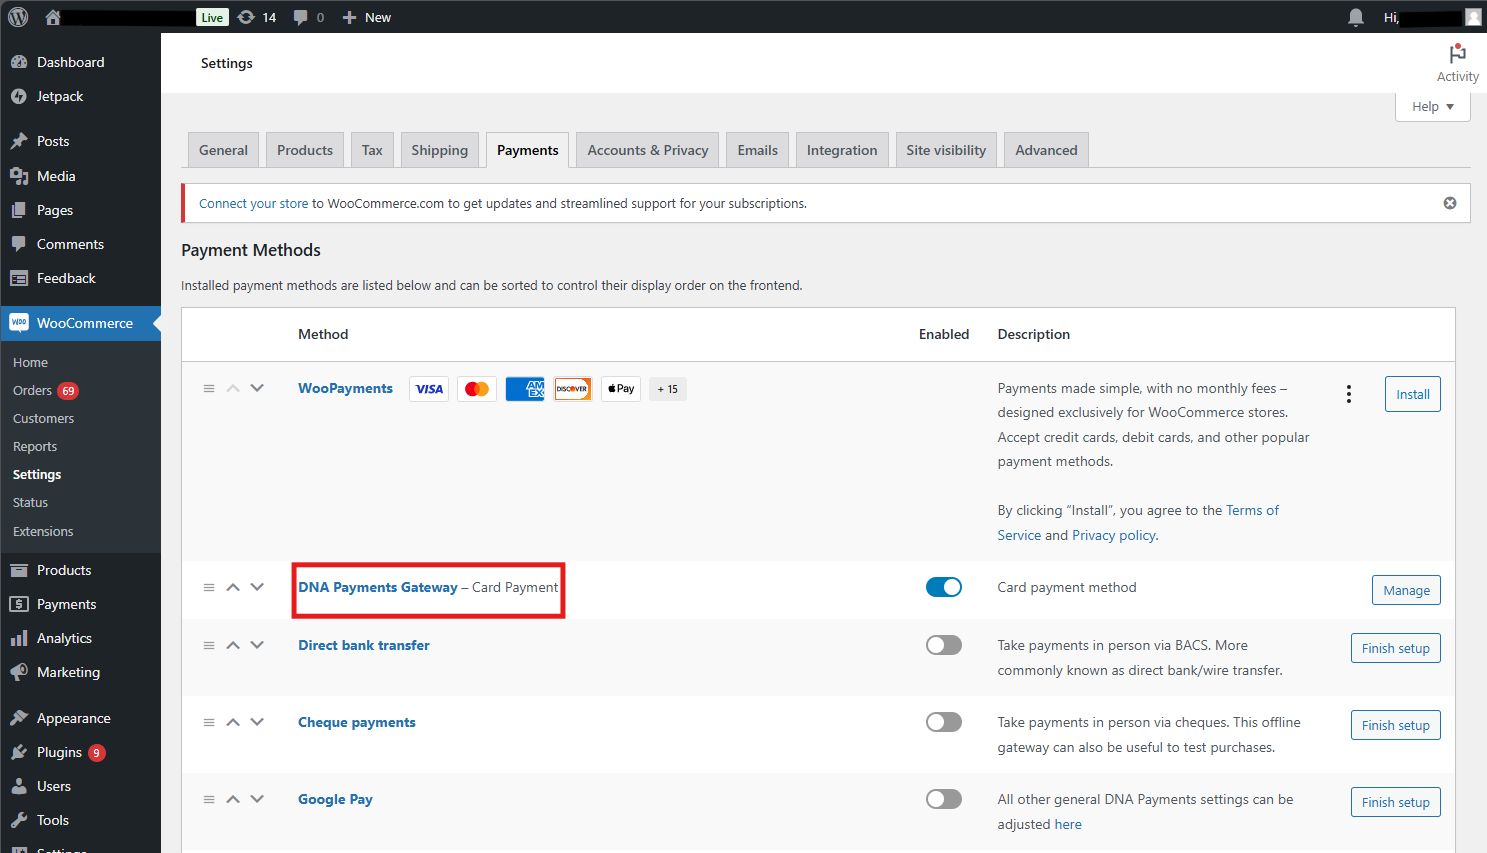
Once the activation process is completed the DNA Payments plugin will appear in the list of options under the ‘Payments’ section as shown above.
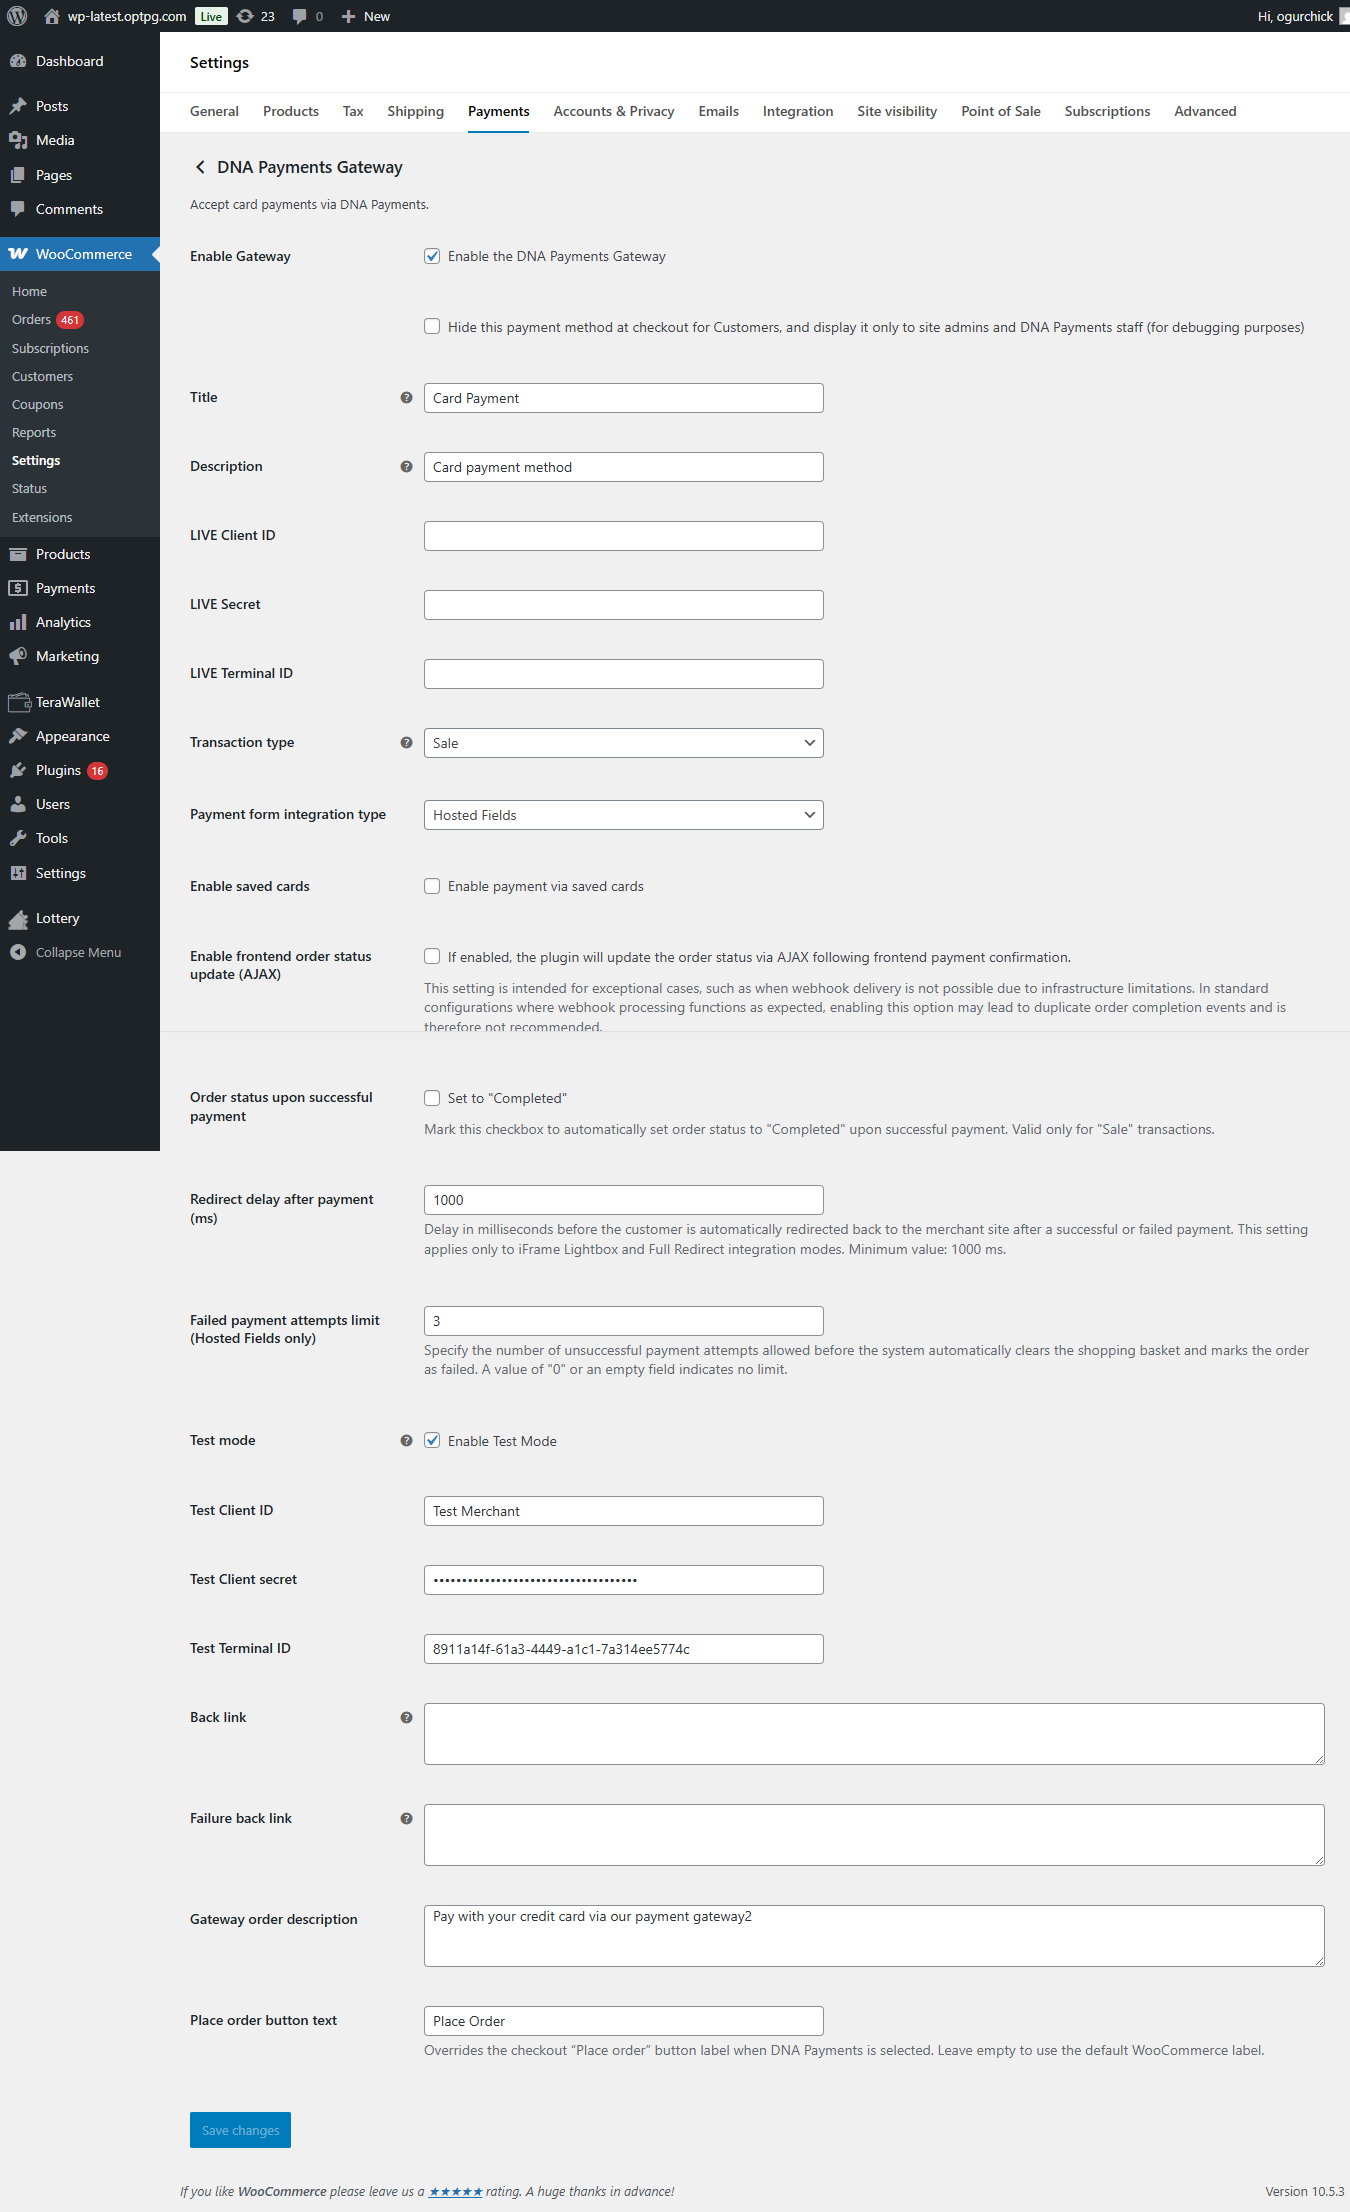
Configuring the DNA Payments Plugin
Now the installation has been completed the DNA Payments plugin needs to be configured with the test or live credentials as outlined in section 3 of this document.
Step One
Click ‘Manage’ on the DNA Payments plugin.
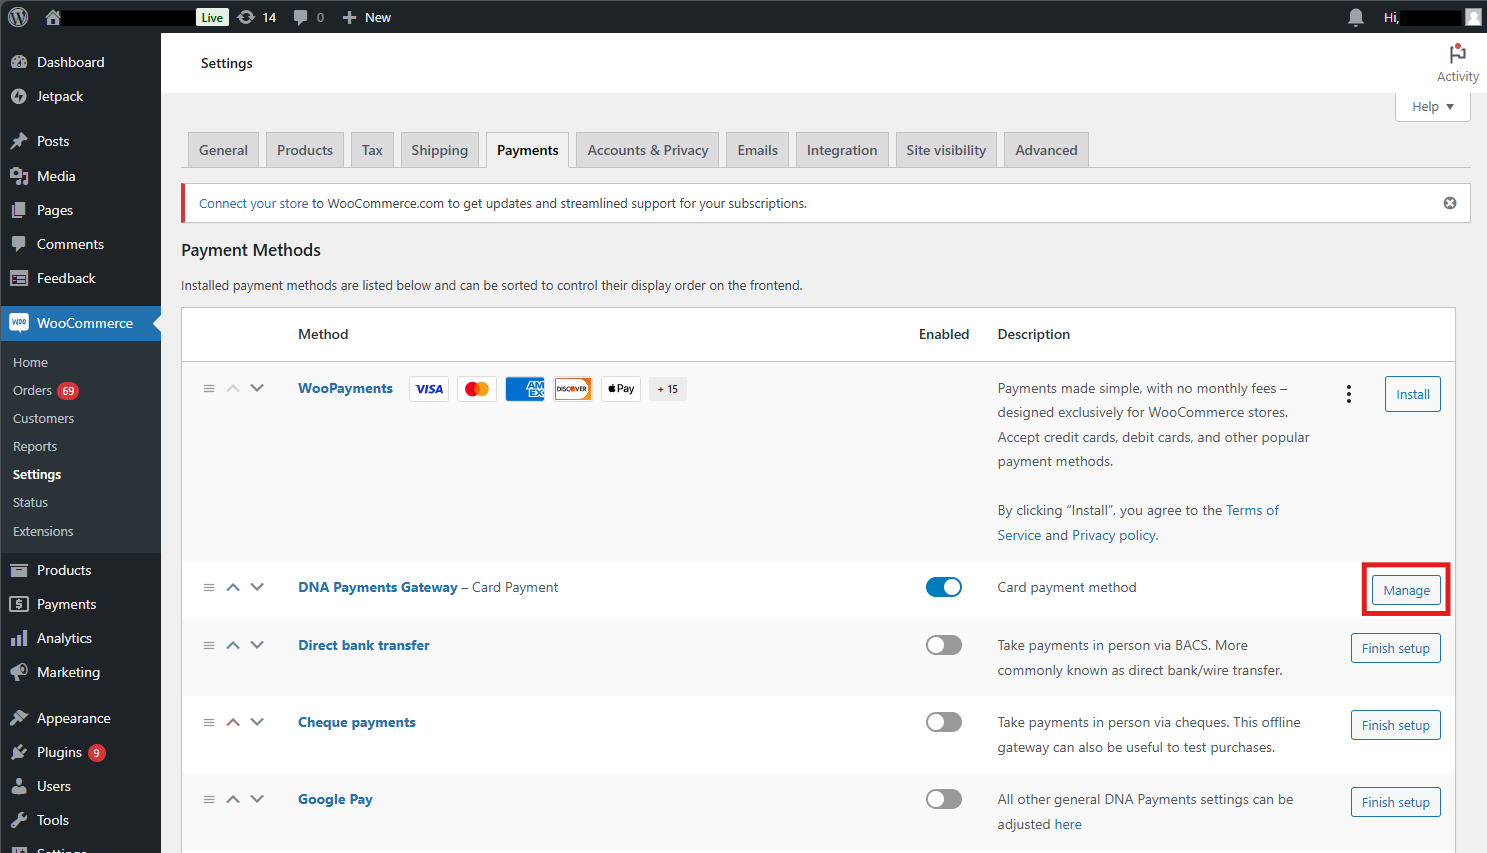
Step Two
The configuration fields are then displayed. The table on the following page details the fields and provides guidance on how they should be configured.
| DNA Payments Plugin - Configuration Fields | ||
|---|---|---|
| Field | State | Description |
| Enable/Disable | Mandatory | Chooses whether to enable to disable the DNA Payments plugin |
| Description | Mandatory | Descriptive text displayed to the Customer during the checkout process |
| LIVE Client ID | Conditional | Mandatory if processing on live. LIVE Client ID issued by DNA Payments |
| LIVE Secret | Conditional | Mandatory if processing on live. LIVE Secret issued by DNA Payments |
| LIVE Terminal ID | Conditional | Mandatory if processing on live. LIVE Terminal ID issued by DNA Payments |
| Test Mode | Conditional | When selected processes all transactions against the DNA Payments test platform |
| Test Client ID | Conditional | Mandatory if processing on test. Test Client ID issued by DNA Payments |
| Test Secret | Conditional | Mandatory if processing on test. Test Secret issued by DNA Payments |
| Test Terminal ID | Conditional | Mandatory if processing on test. Test Terminal ID issued by DNA Payments |
| Transaction type | Optional | Indicates whether to capture funds immediately or only to authorize the payment for later capture. As there is no default option, the merchant must choose the approach that best suits their business. |
| Payment form integration type | Optional | Specifies how the payment form is integrated: • Full Redirect - Redirects the Customer to the Checkout page hosted by DNA Payments. • iFrame Lightbox - Displays a payment window on the merchant’s checkout page. • Hosted Fields - Embeds card fields and Alternative Payment Method buttons directly on the checkout page for a seamless experience. Please note that Hosted Fields is not enabled by default and must be requested through your account manager. |
| Enable saved cards | Optional | Allows customers to save their card details for future payments, enabling a faster and more convenient checkout experience. |
| Order status upon successful payment | Optional | Mark this checkbox to automatically set order status to "Completed" upon successful payment. Valid only for "Sale" transactions. |
| Failed payment attempts limit (Hosted Fields only) | Optional | Specify the number of unsuccessful payment attempts allowed before the system automatically clears the shopping basket and marks the order as failed. A value of "0" or an empty field indicates no limit. |
| Back Link | Optional | Tells the DNA Payments plugin where to re-direct the Customer following the completion of a transaction |
| Failure Back Link | Optional | Tells the DNA Payments plugin where to re-direct the Customer following the completion of an unsuccessful transaction. If this field is not populated the ‘Back Link’ will be used for all transactions regardless of result. |
| Gateway Order Description | Mandatory | Message that will appear in the Checkout description field and in the DNA Payments Merchant Portal for every transaction. |
Here is the 'Settings' page, over 2 screenshots.
Step Three
Once all the elements have been configured press the ‘Save Changes’ button. Once they have been saved successfully the above will be displayed.
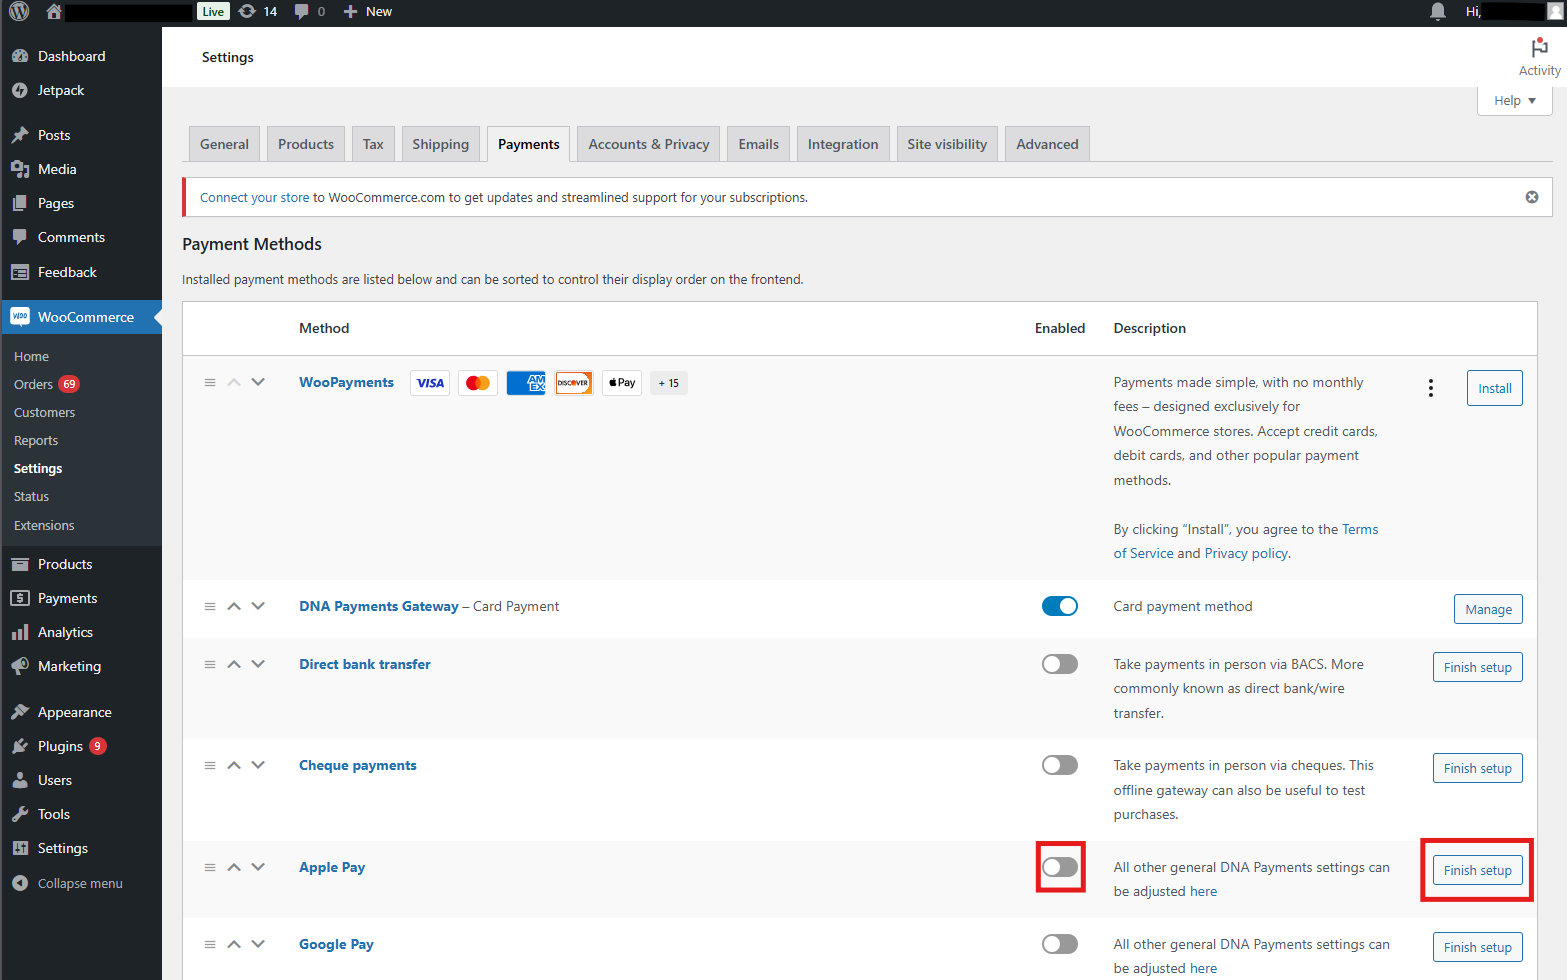
If you are adding Apple Pay and Google Pay to the Woo Commerce Solution, in the live environment, you will need to take the following steps.
Activating Apple Pay
Step One to Three
Before setting up Apple Pay in WooCommerce, log into the Merchant Portal. To enable Applepay, follow the instructions in the APM activations page. This is found in the Merchant Portal section of the developer portal. See here
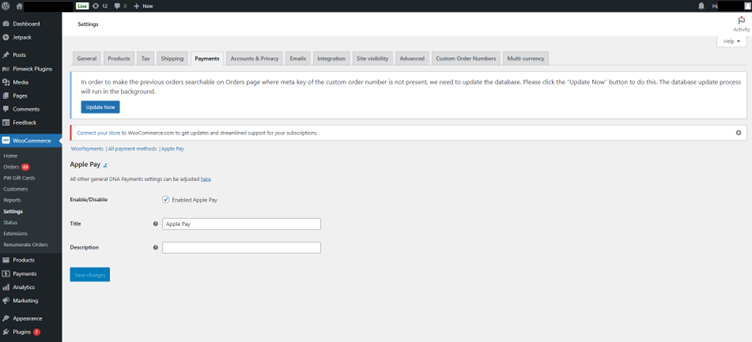
Step Four (For Hosted Fields integration only)
Enable 'Apple Pay' / 'Apple Pay by DNA Payments', then click on 'Manage'.
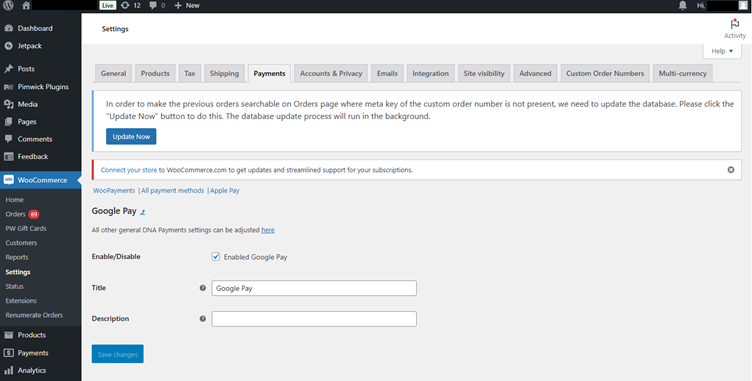
On the Settings page, you will be able to edit the Title and Description, which the customer can see on the checkout page.
Activating Google Pay
Step One
Before setting up Google Pay in WooCommerce, log into the Merchant Portal. To enable Googlepay, follow the instructions in the APM activations page. This is found in the Merchant Portal section of the developer portal, see here.
Step Two (For Hosted Fields integration only)
Enable 'Google Pay' / 'Google Pay by DNA Payments', then click on 'Manage’.
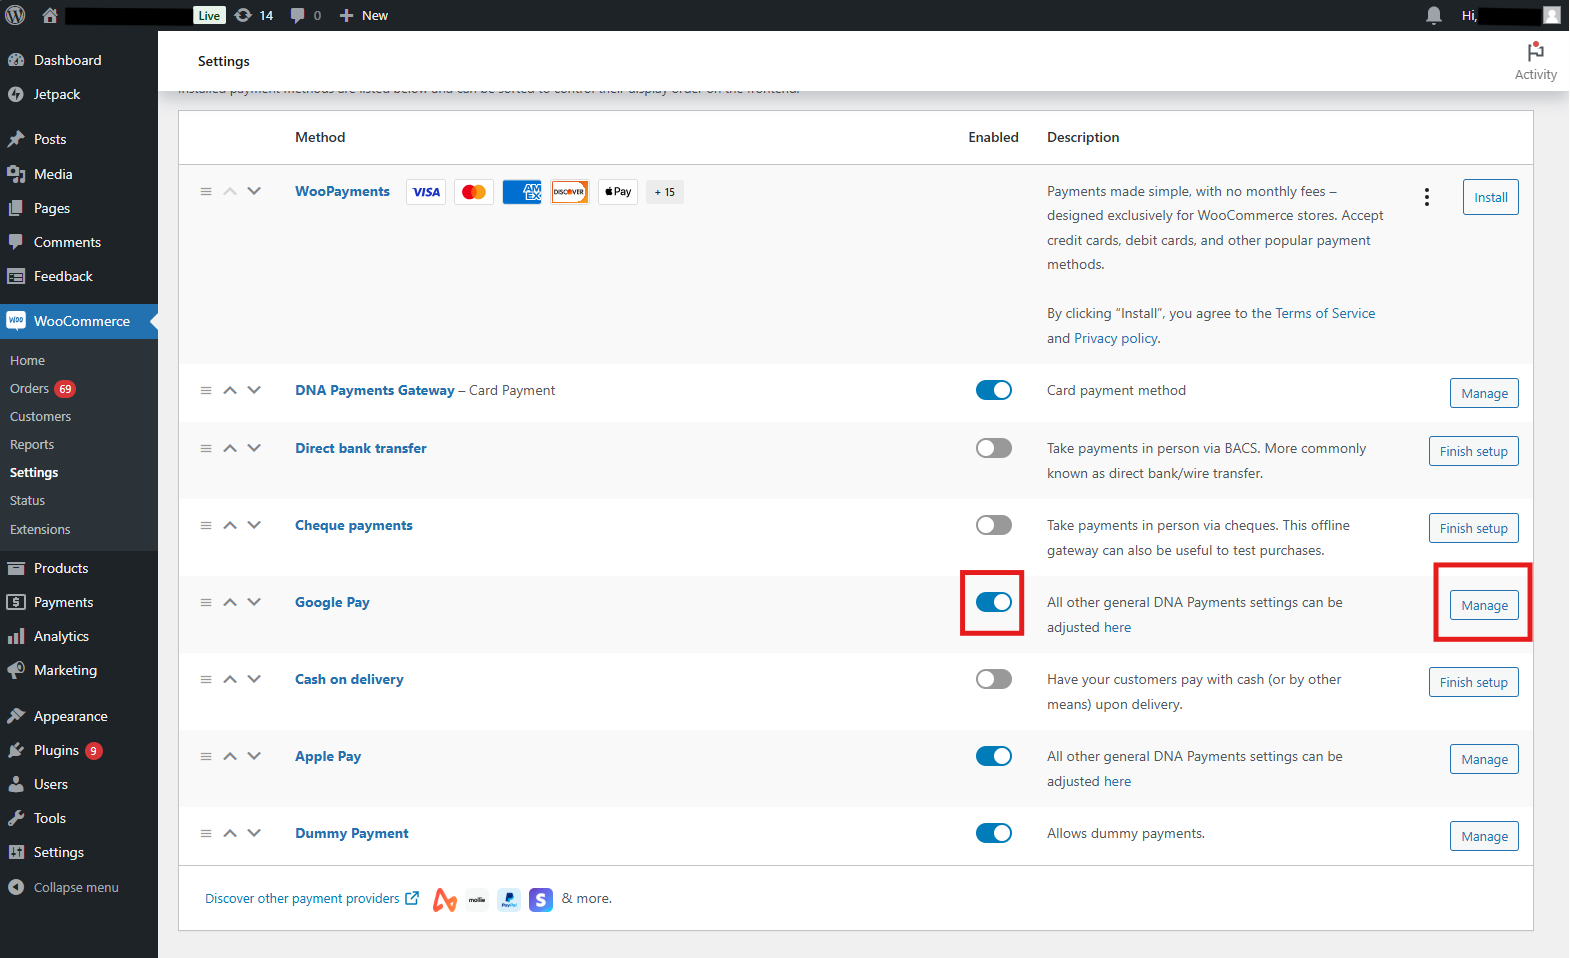
On the Settings page, you will be able to edit the Title and Description, which the customer can see on the checkout page.
Woo Subscriptions
There is also the option to use Woo Subscriptions with our supported plugin. To use this feature, the merchant must purchase and install the Woo Subscriptions add-on and enable it within their WordPress online store. See the screenshot below.
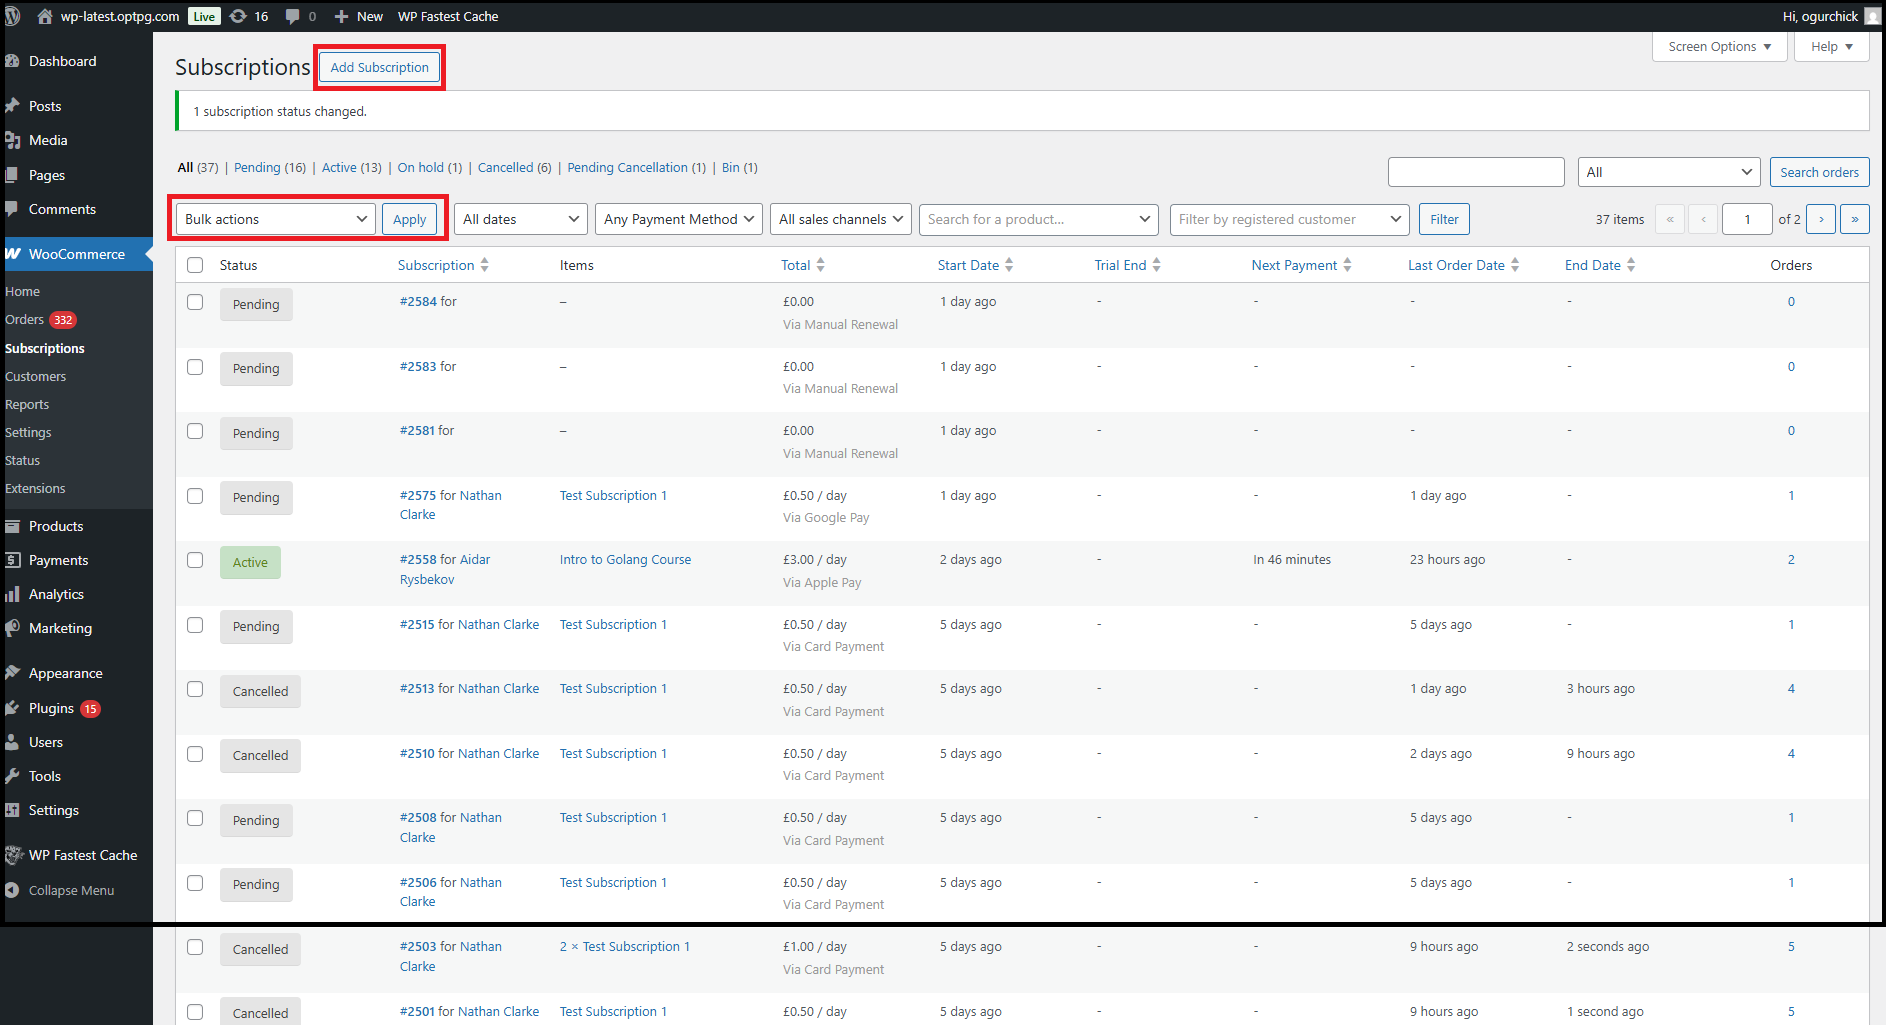
You can perform Bulk Actions by selecting the required action and clicking Apply to update existing subscriptions.
Do not use the Add Subscription button to create a new subscription. Instead, navigate to Products in the WooCommerce settings.
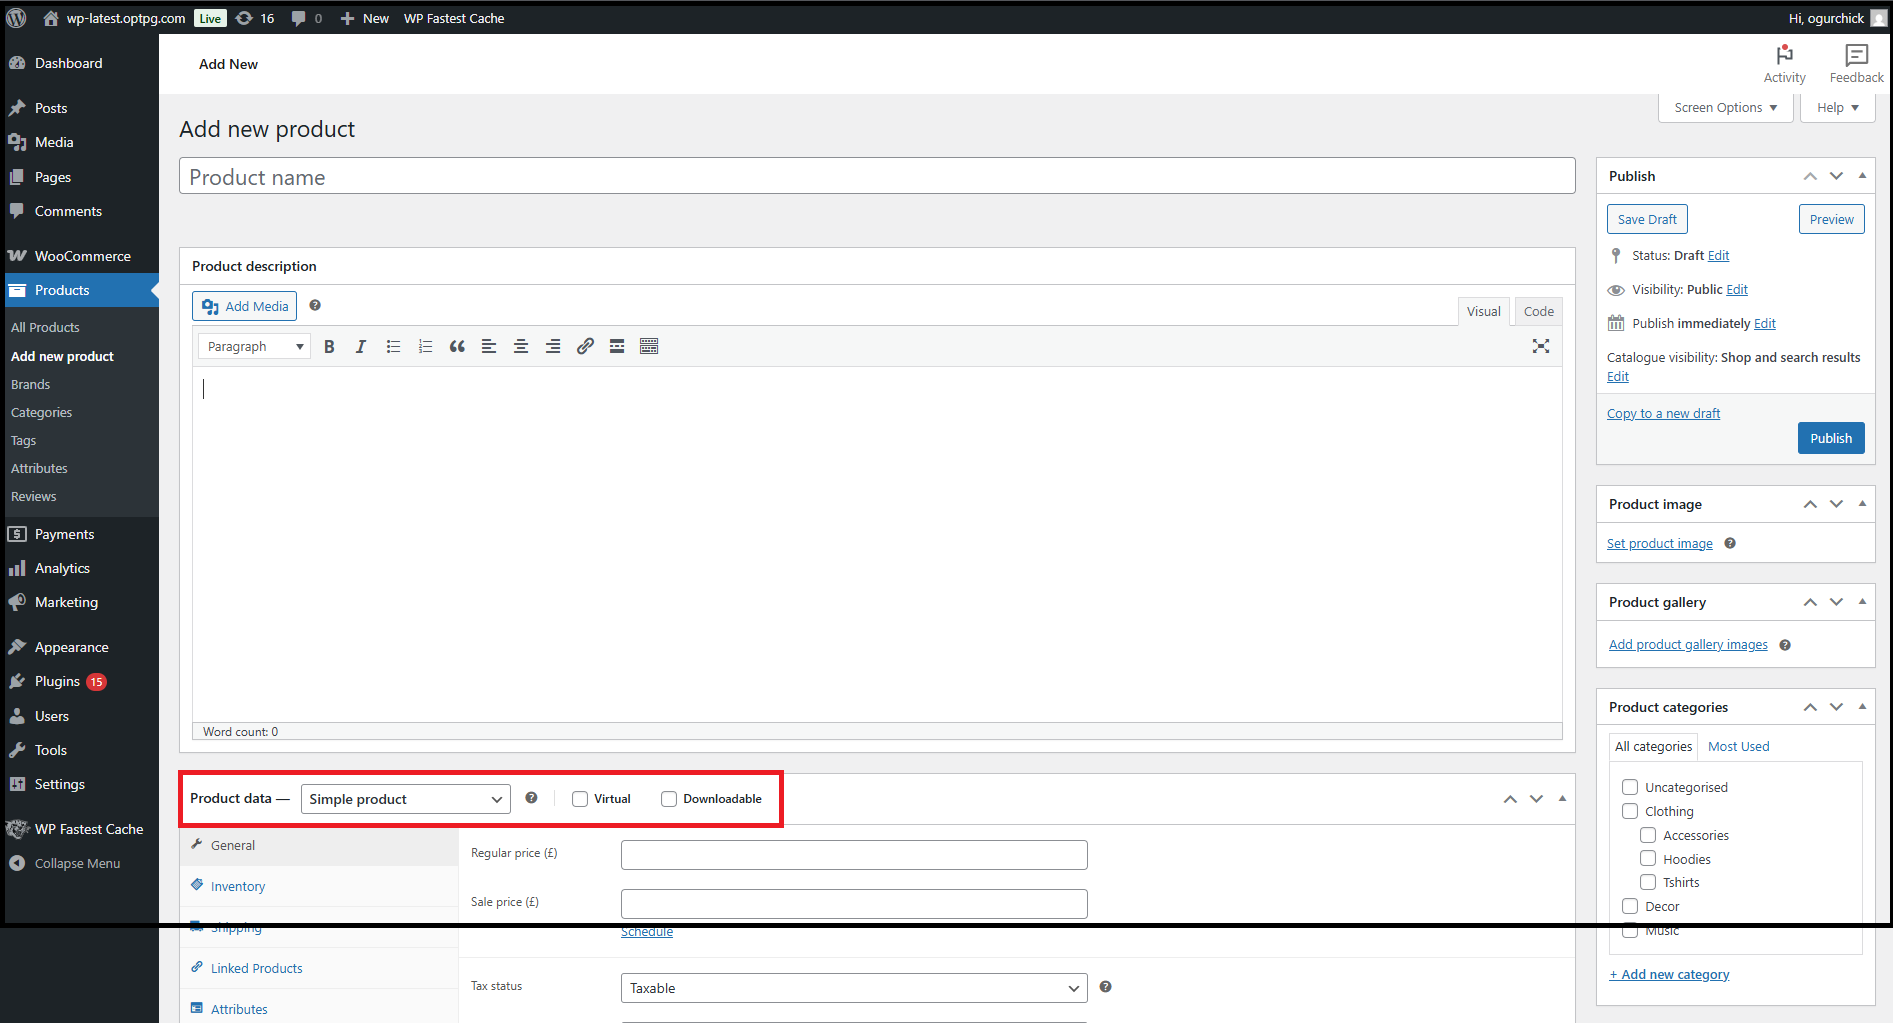
After naming your product, select Subscription from the Product data dropdown. Two subscription types are available: Simple and Variable. We recommend using Simple Subscription, as it provides greater control over product configuration.
Your DNA Payments plugin is now ready to use!